
If you have a store using WooCommerce, you can easily connect it to Hellotext.
By connecting your WooCommerce store, you’ll be able to start tracking all your customers’ activity, automatically creating profiles with their data and updating them with the activities they perform.
The following activities are tracked automatically:
- Products viewed
- Abandoned carts
- Cart updates
- Coupons applied
- Orders placed
- Orders updated
With this information, Hellotext can build richer customer profiles, create segments, trigger playbooks or routes, and measure what happens after each message.
Download Plugin
Download the latest version of the Hellotext plugin for WooCommerce.
Installation
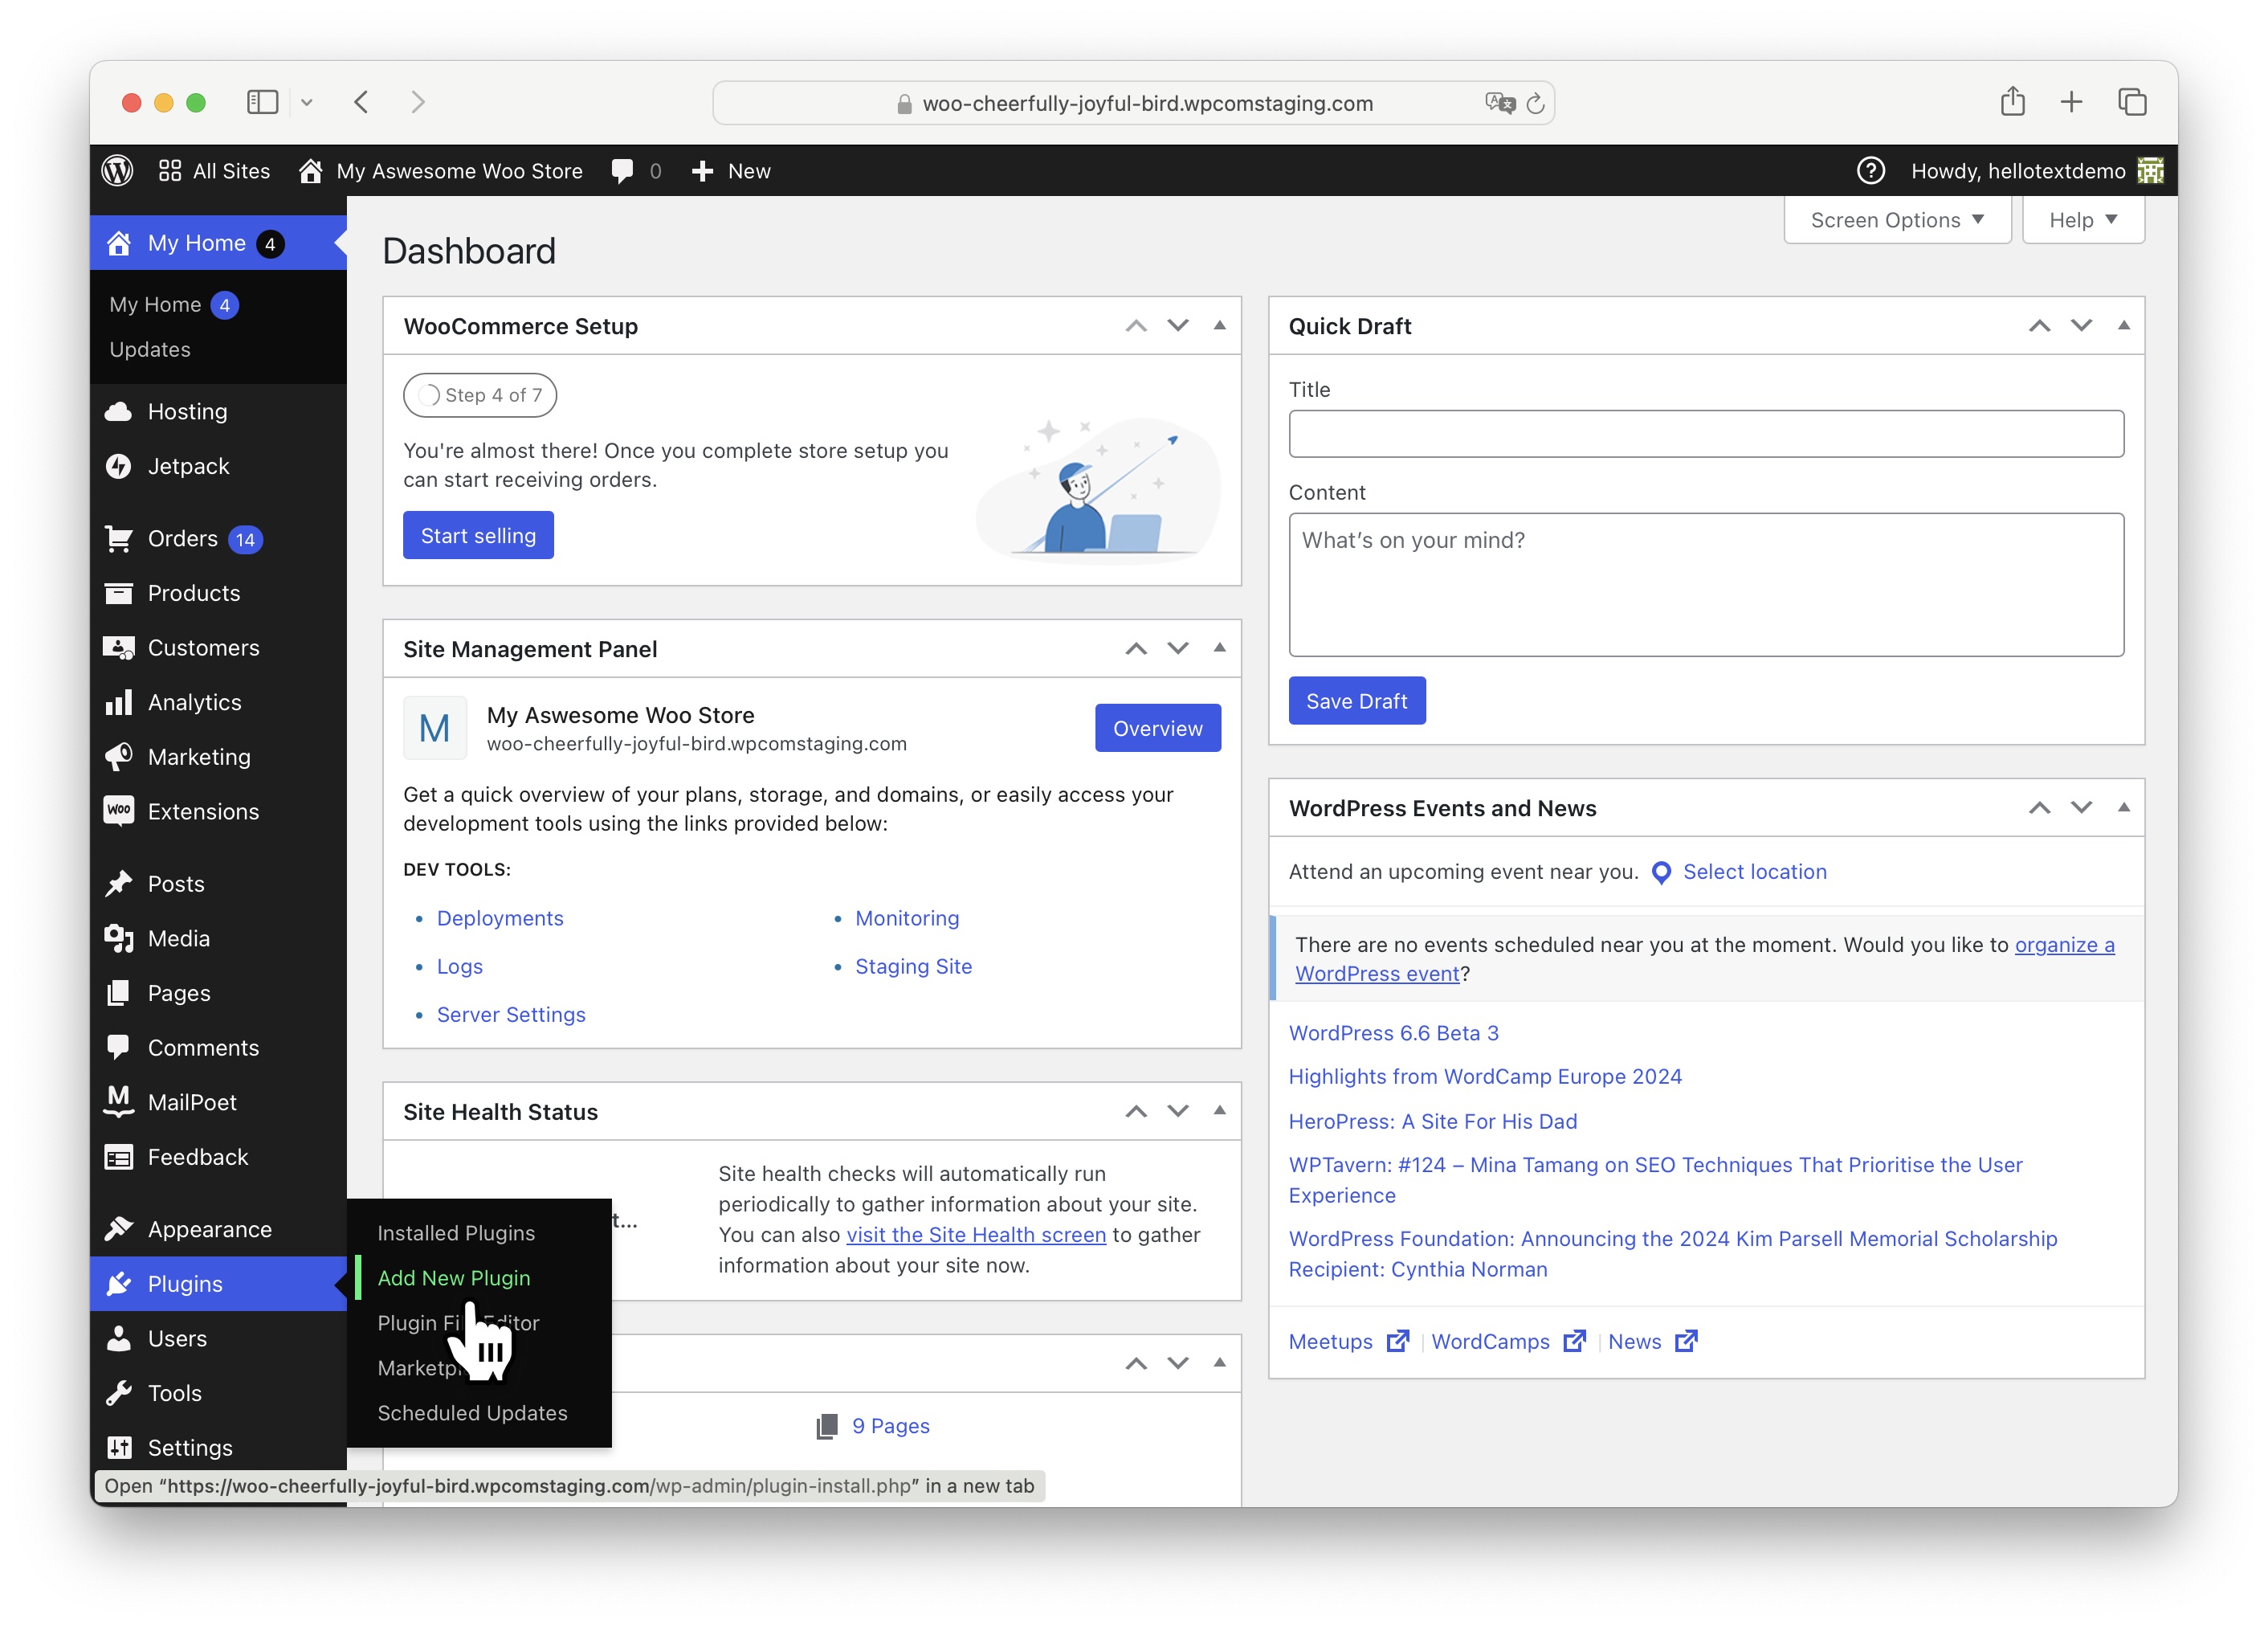
Visit the control panel of your WordPress site where you manage your WooCommerce store, and from the Plugins section, click on Add New Plugin.
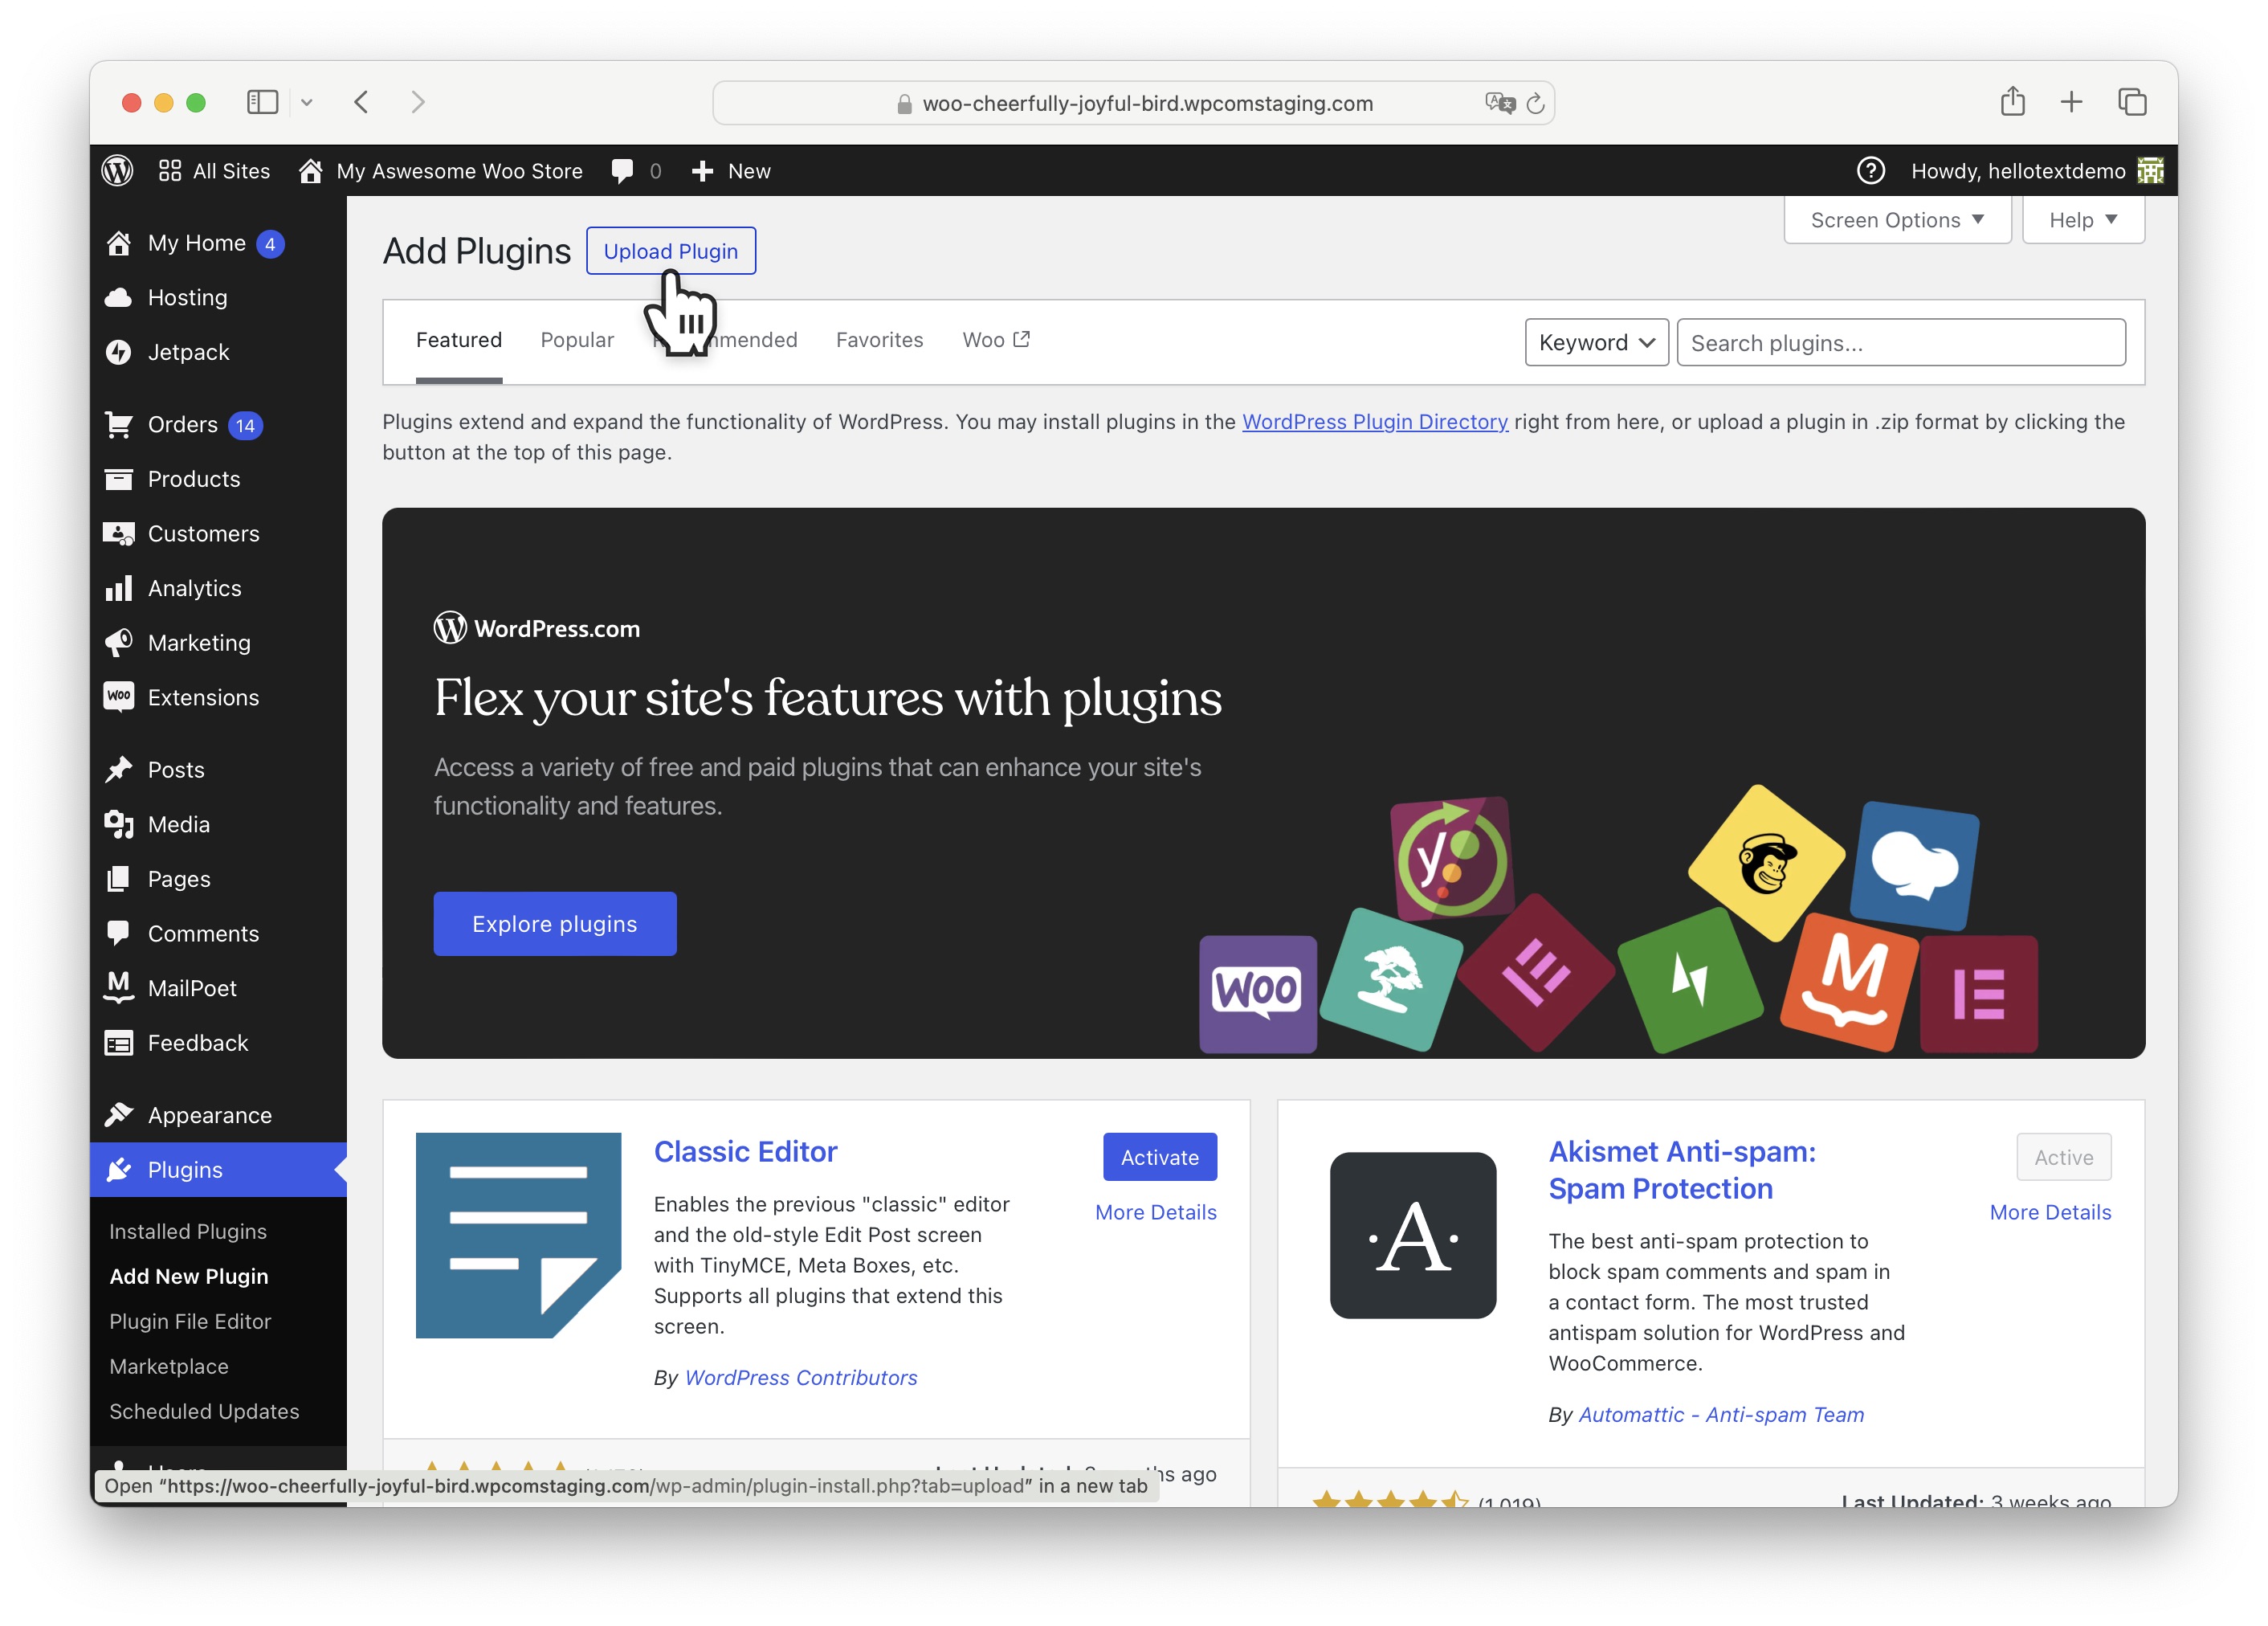
At the top, click on Upload Plugin.
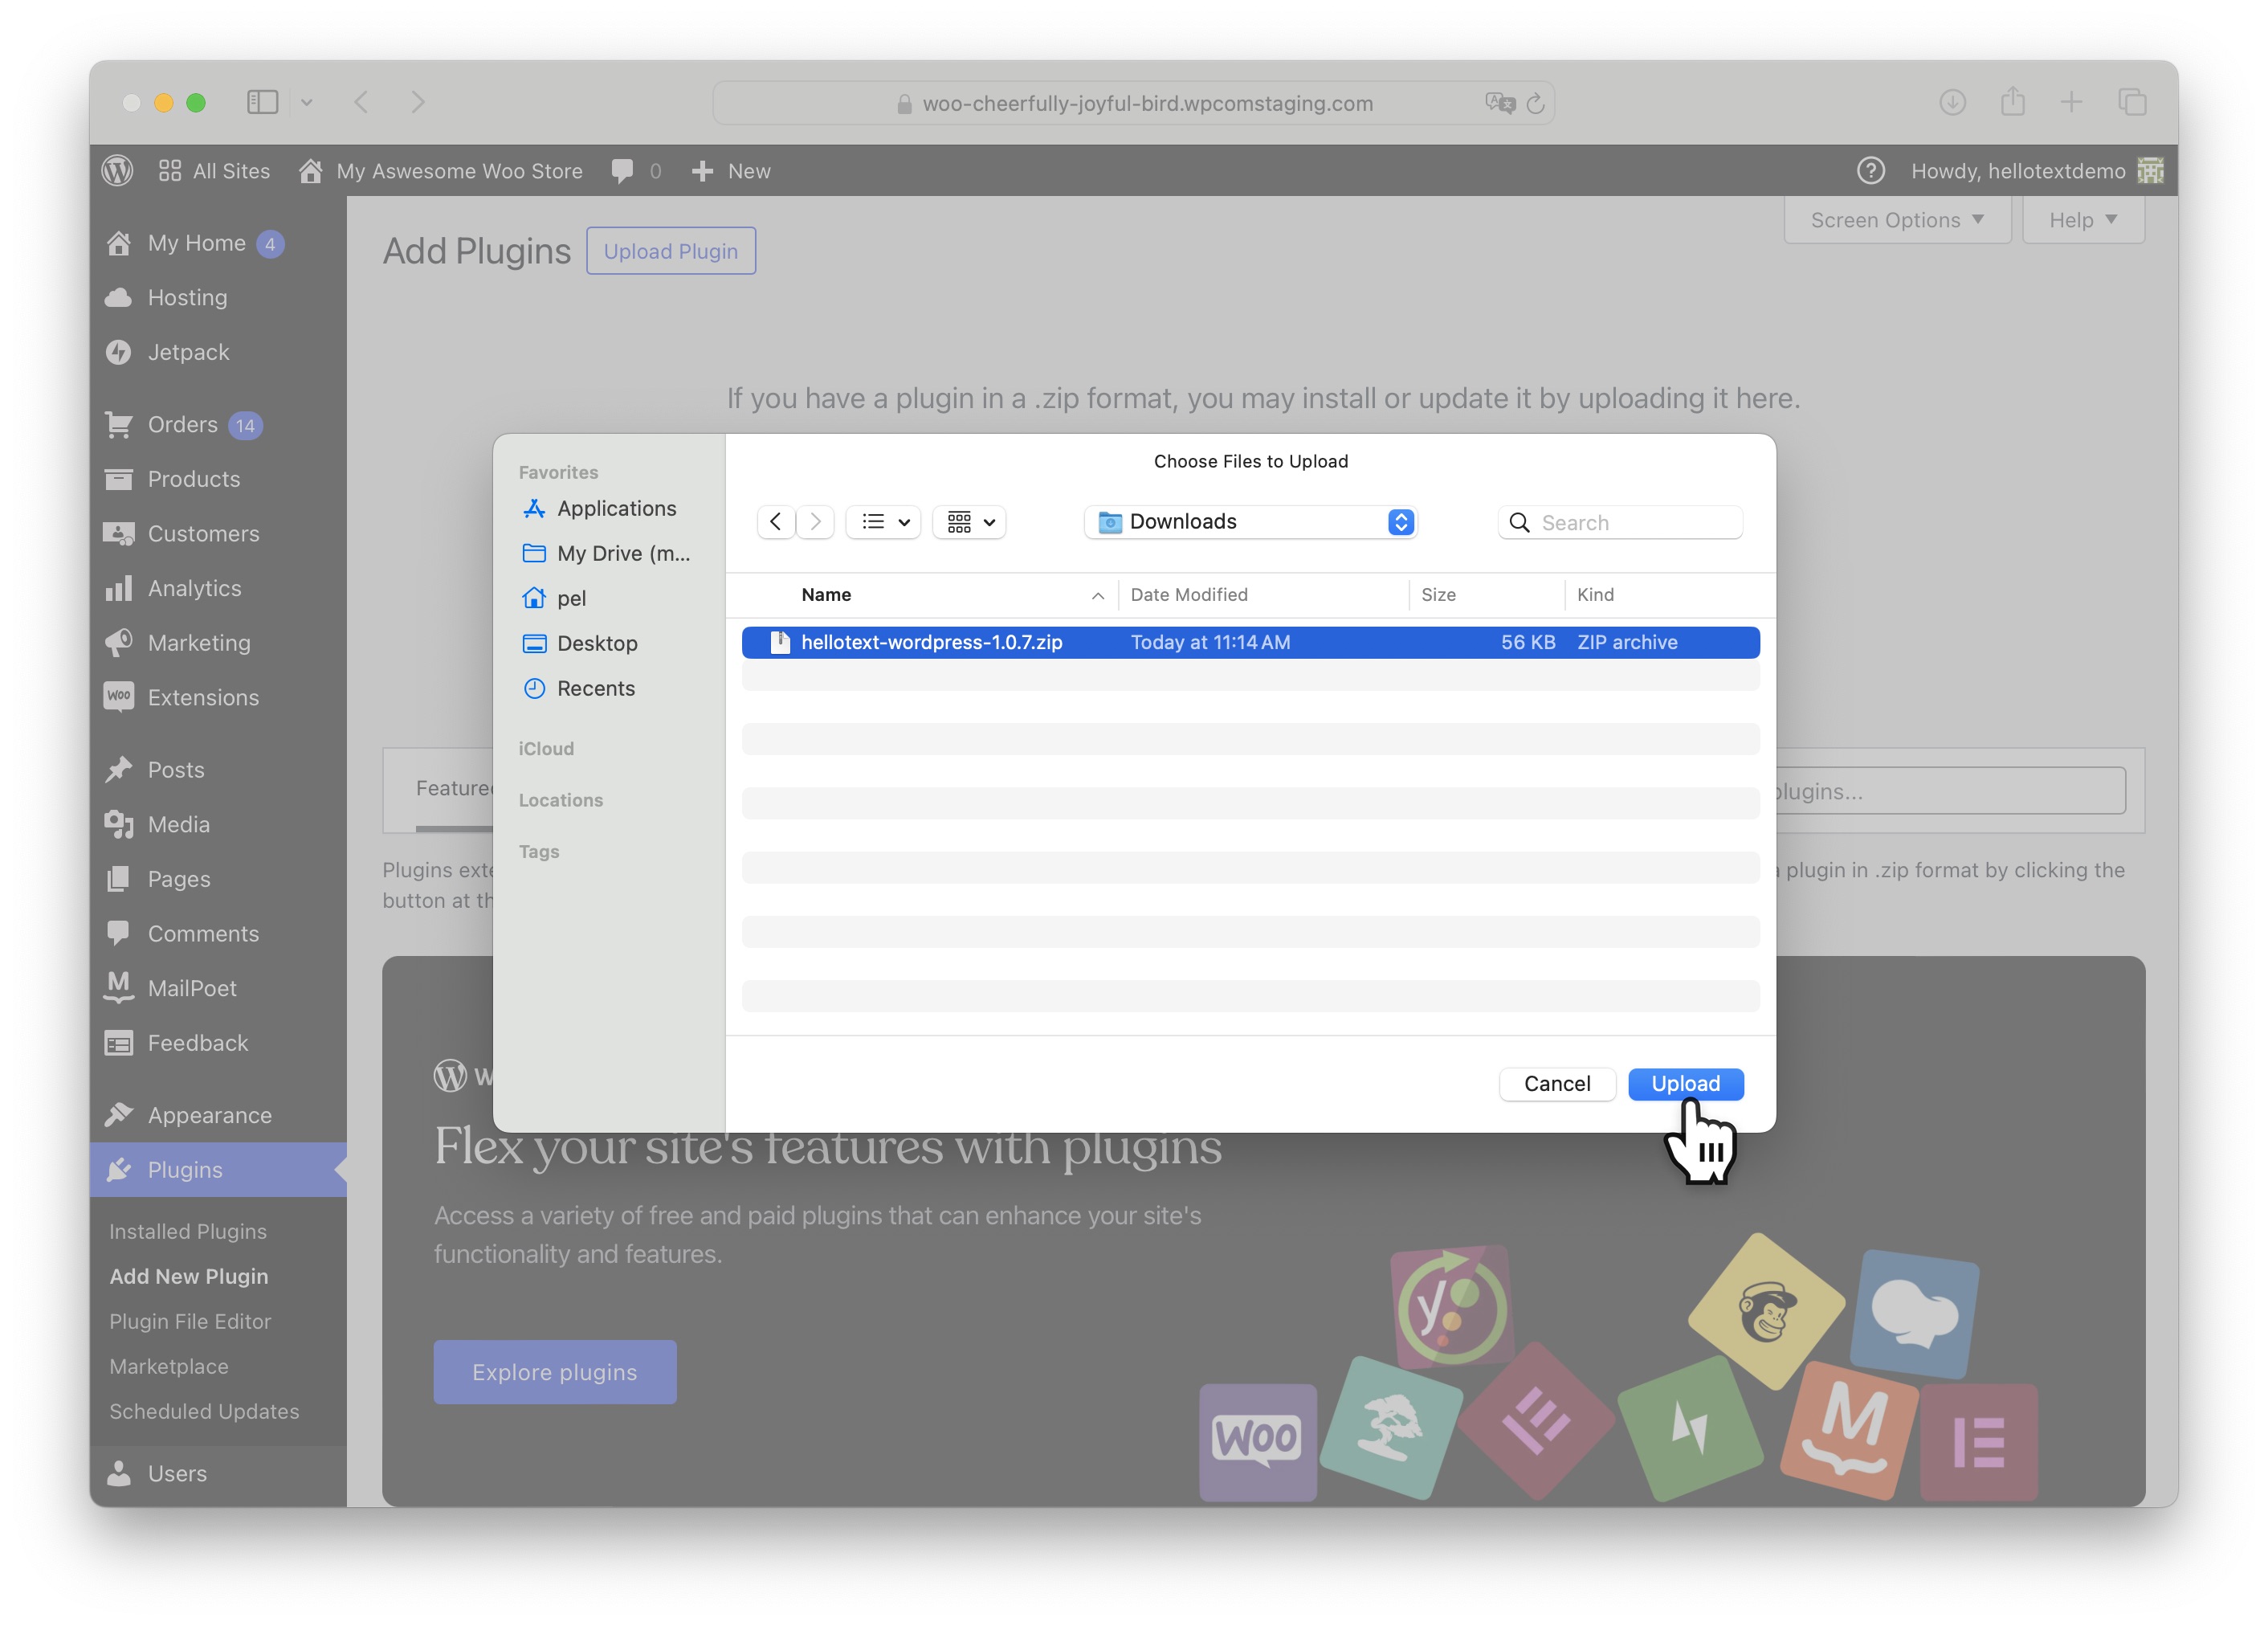
Click the button to choose the Hellotext plugin you downloaded in .zip format from your files.

Select the file from where you downloaded it (typically in the Downloads folder) and confirm to upload it to WordPress.
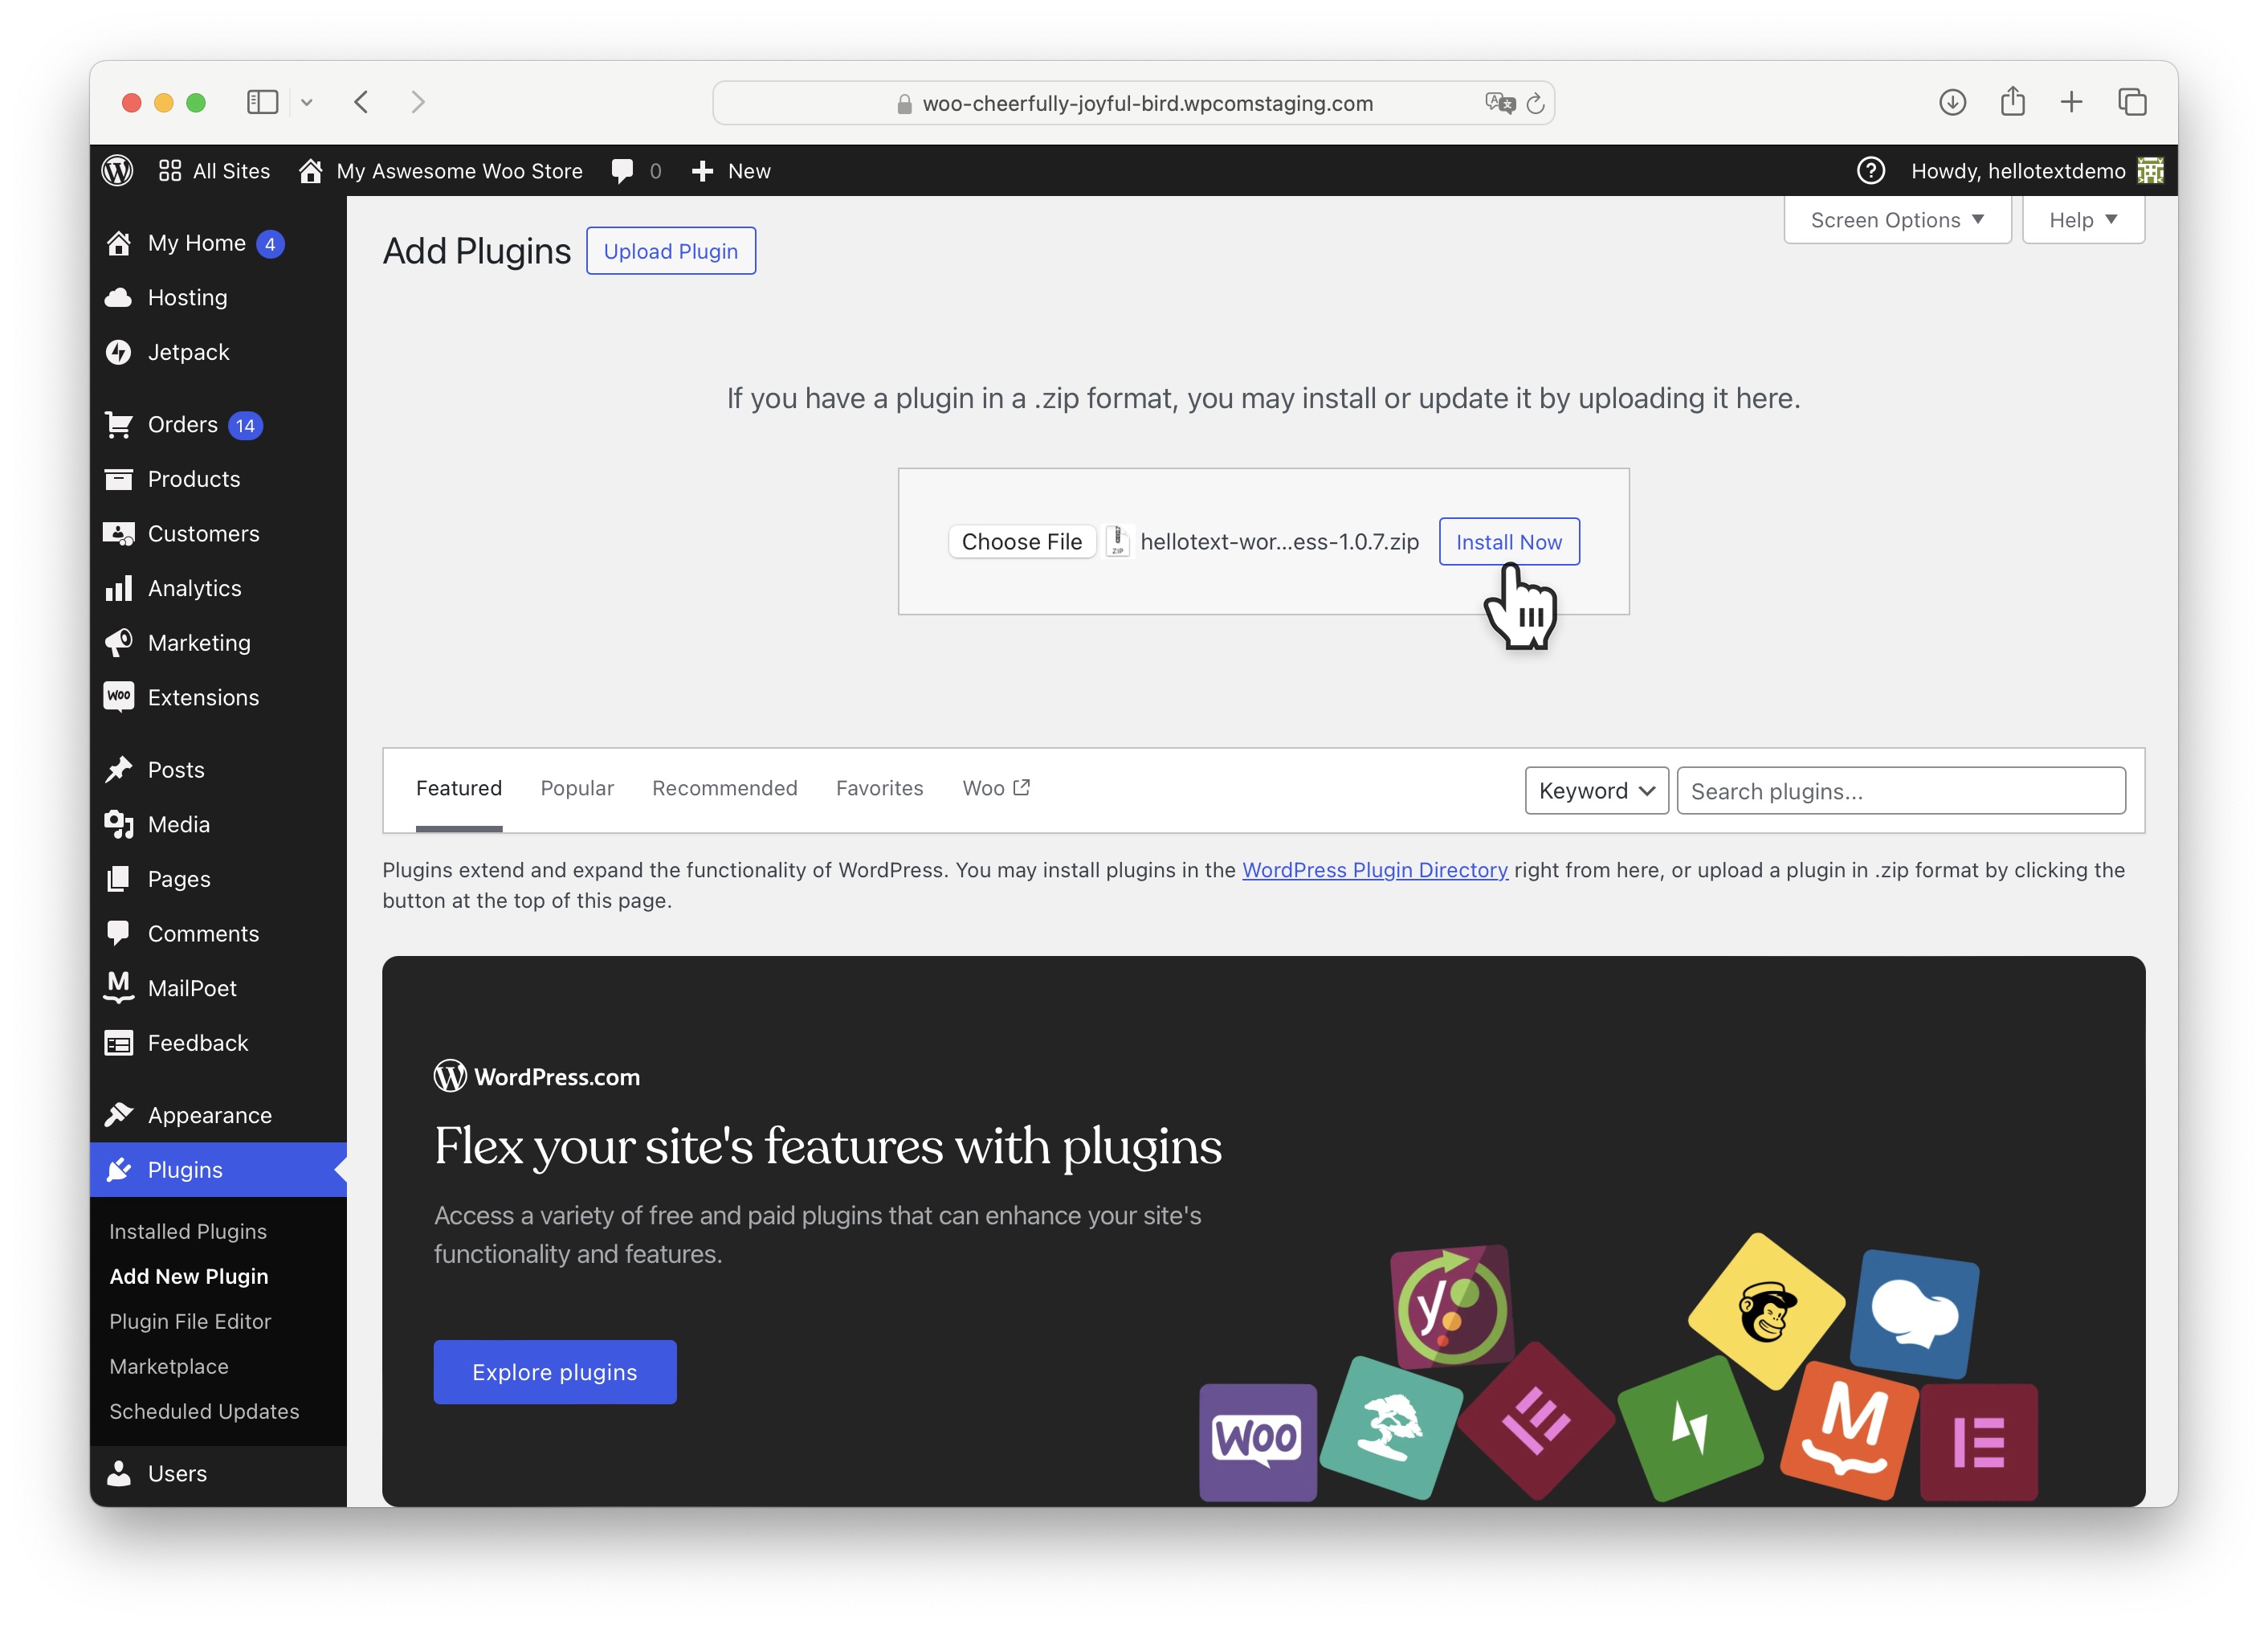
Click on Install Now to install the plugin.
Once installed, click on Activate Plugin to activate it.
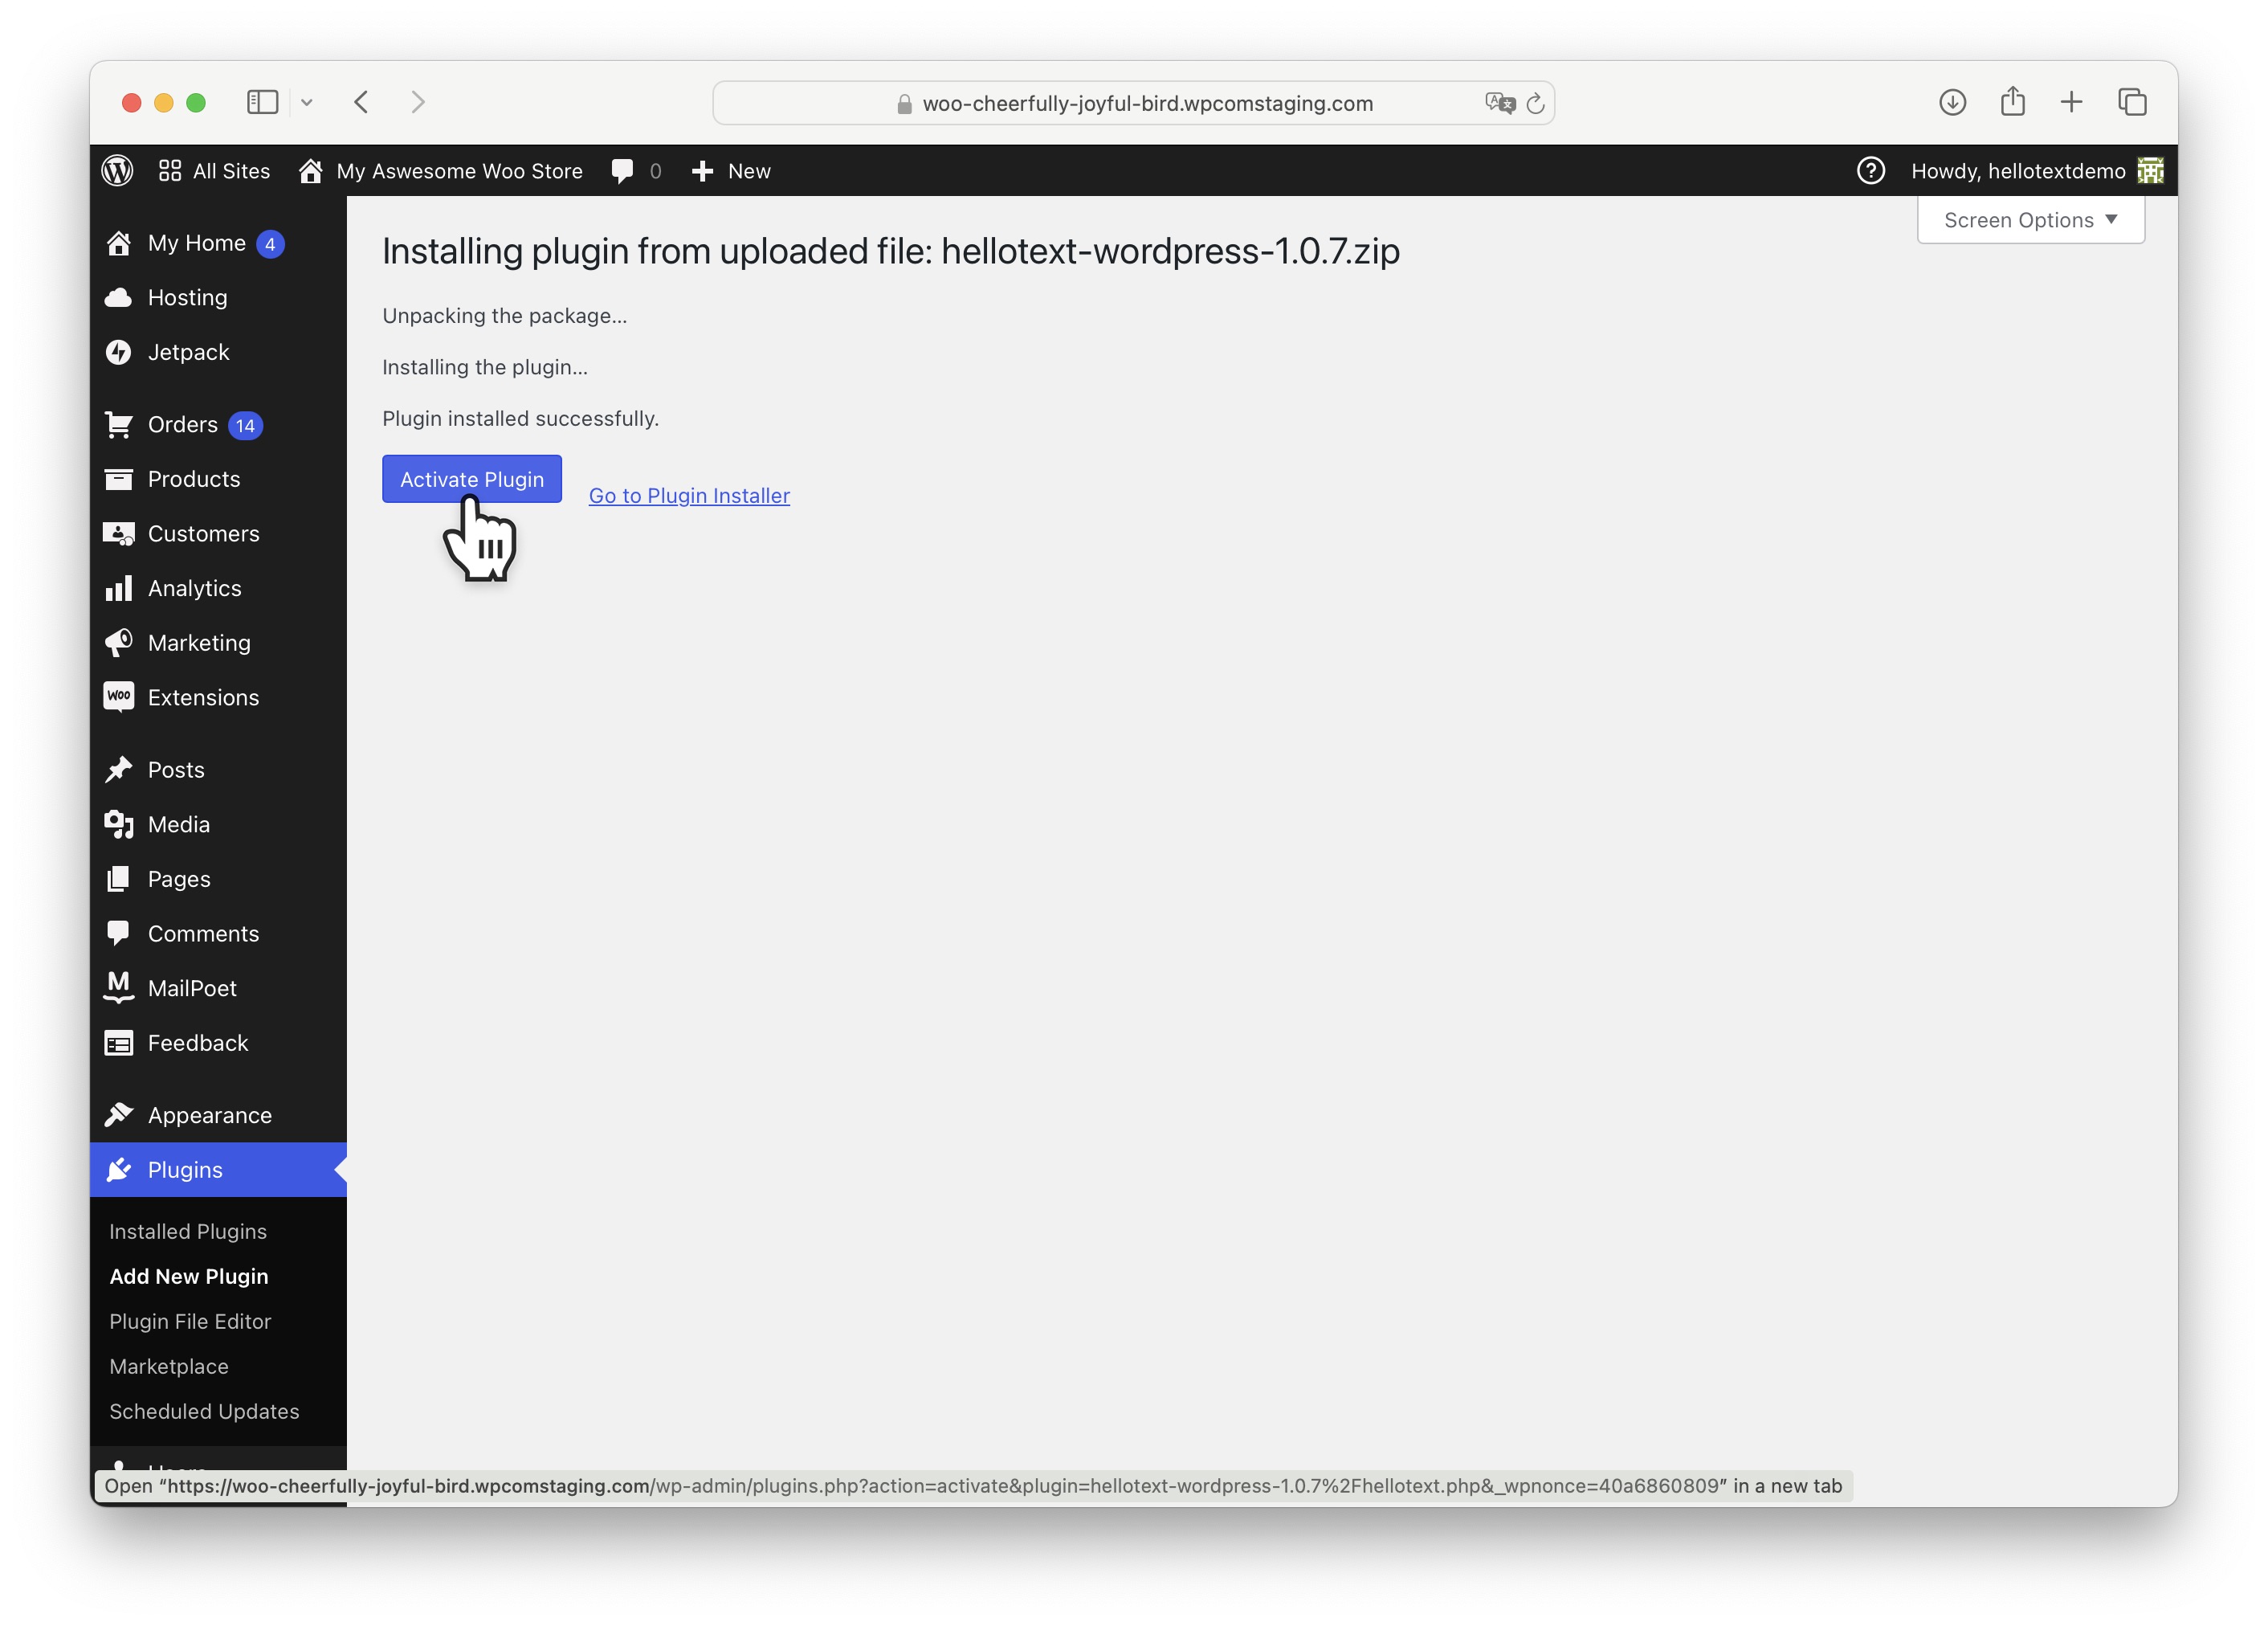
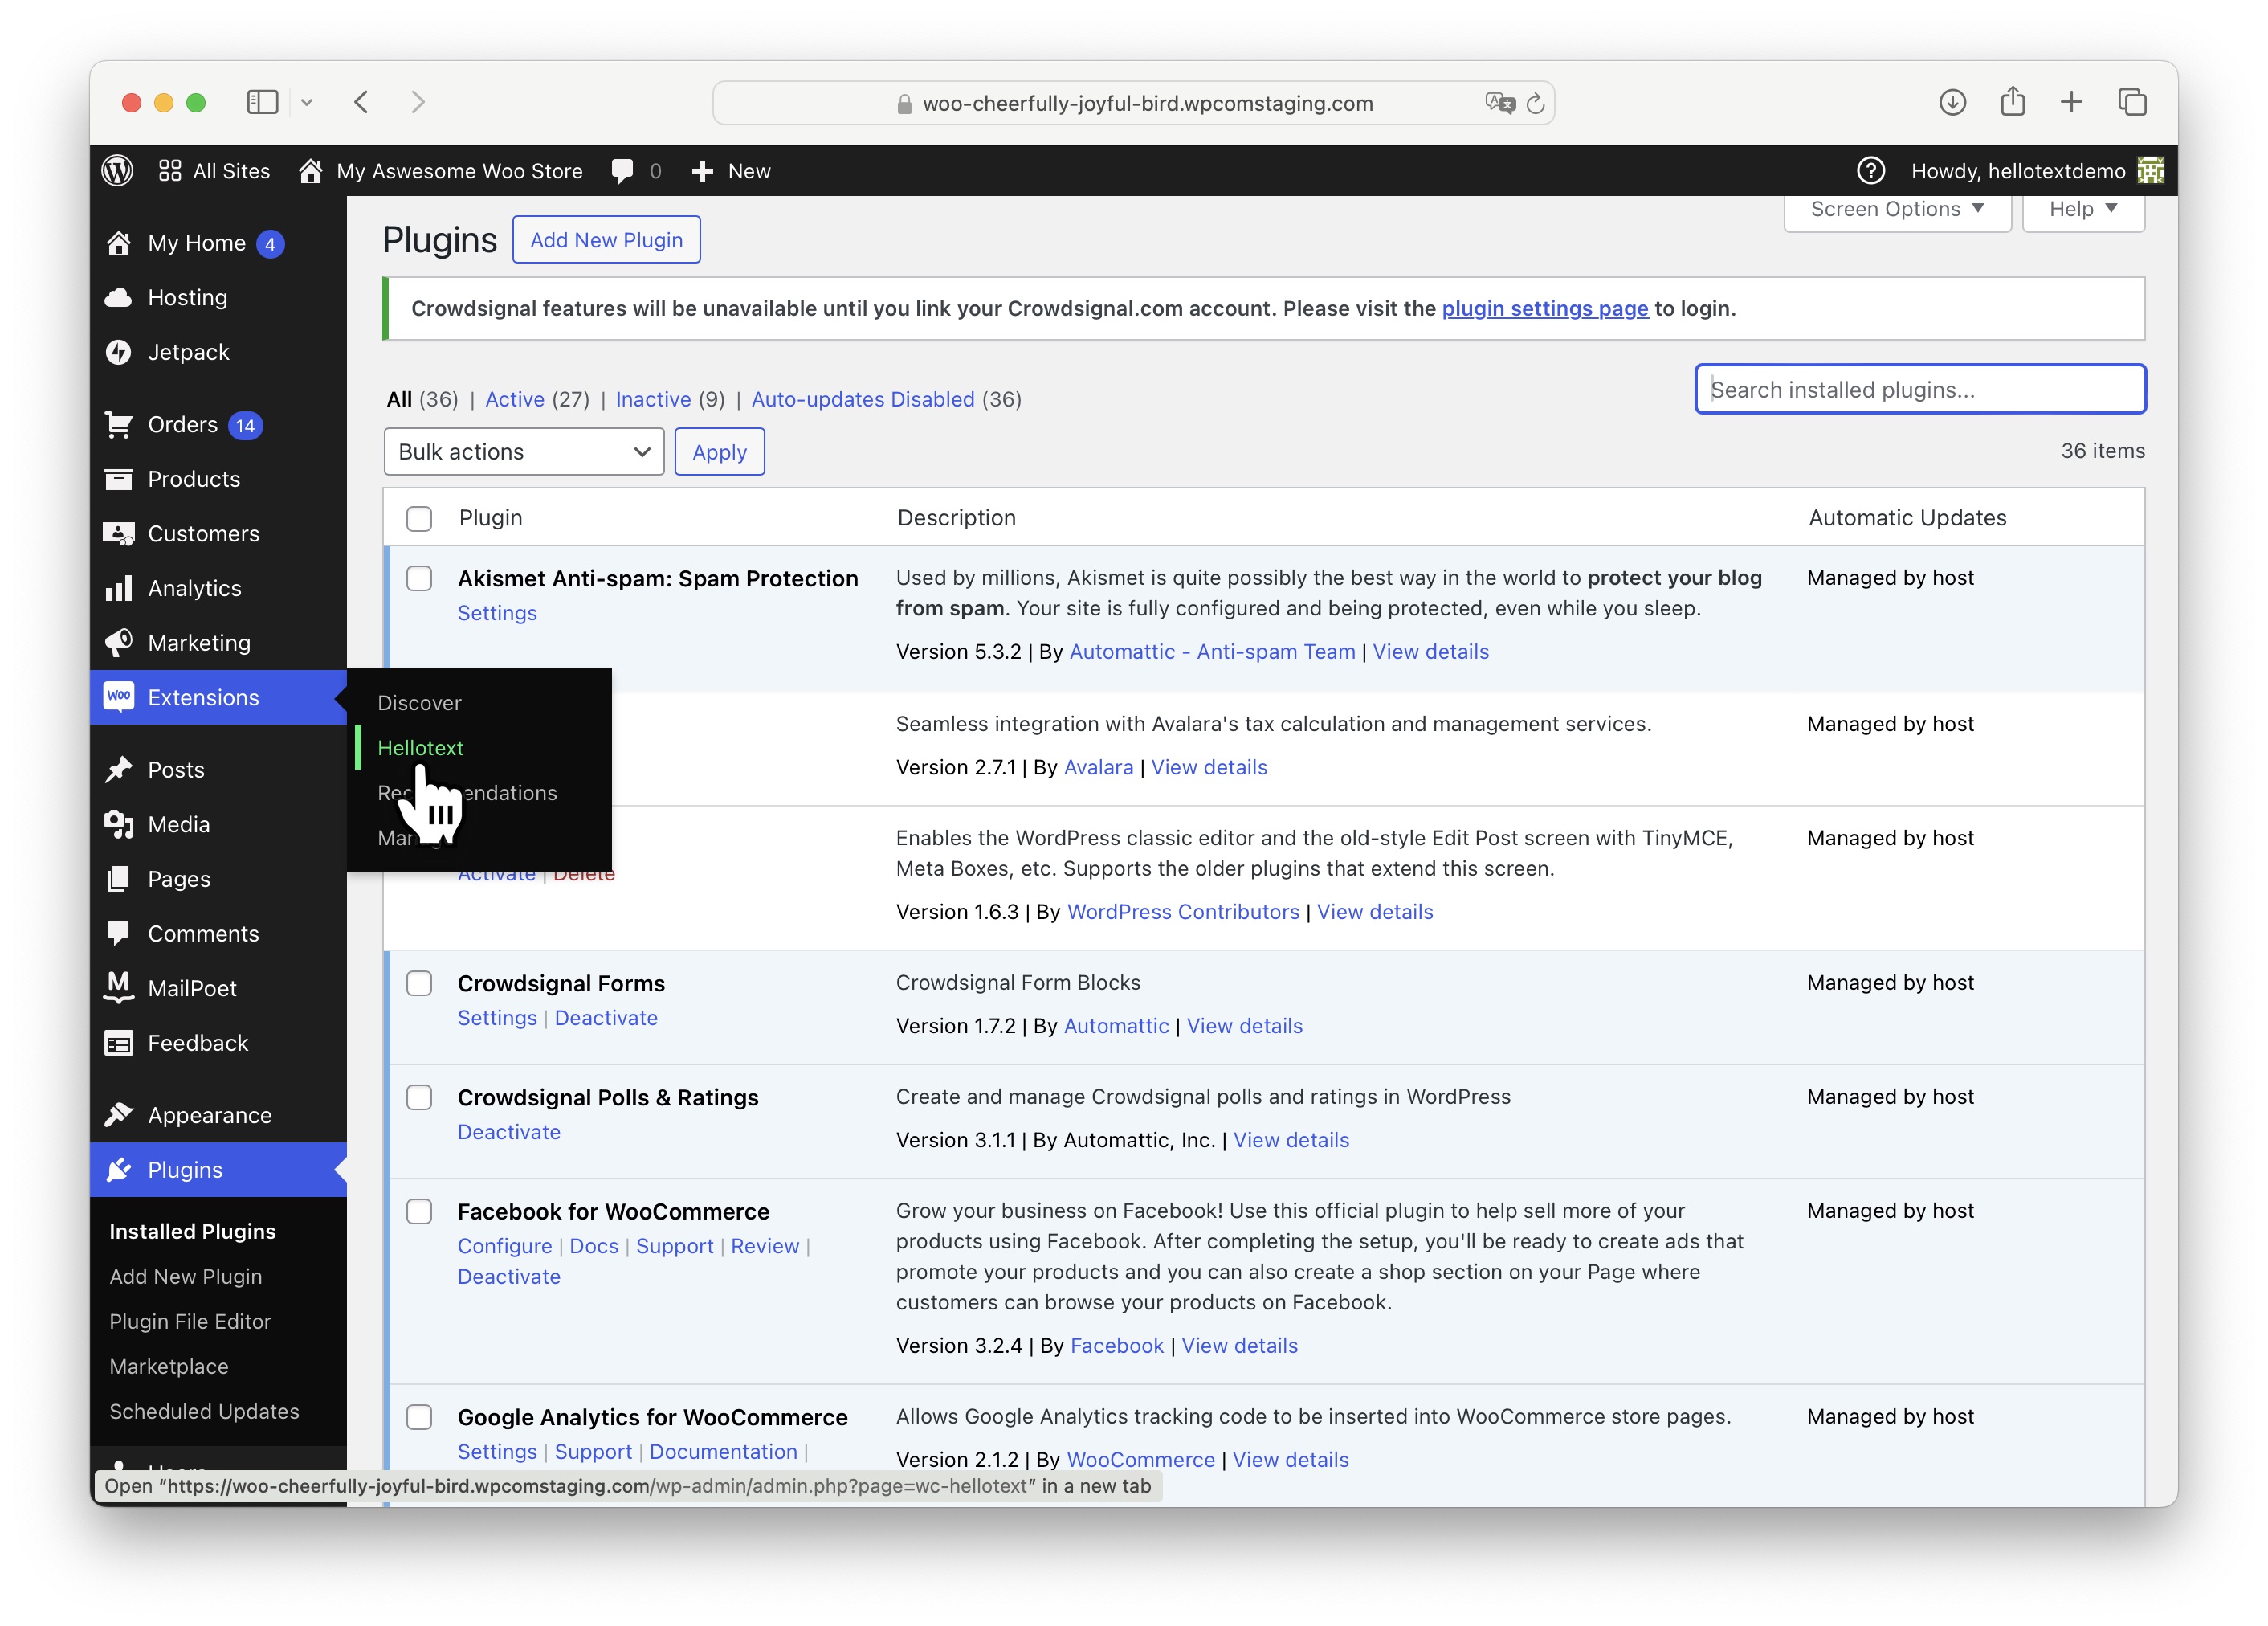
Your plugin is now activated. You can check that it has been correctly installed and activated from Plugins by clicking on Installed Plugins.
You should see Hellotext as shown in the image below.

Configuration
With the Hellotext plugin already installed, let’s configure it.
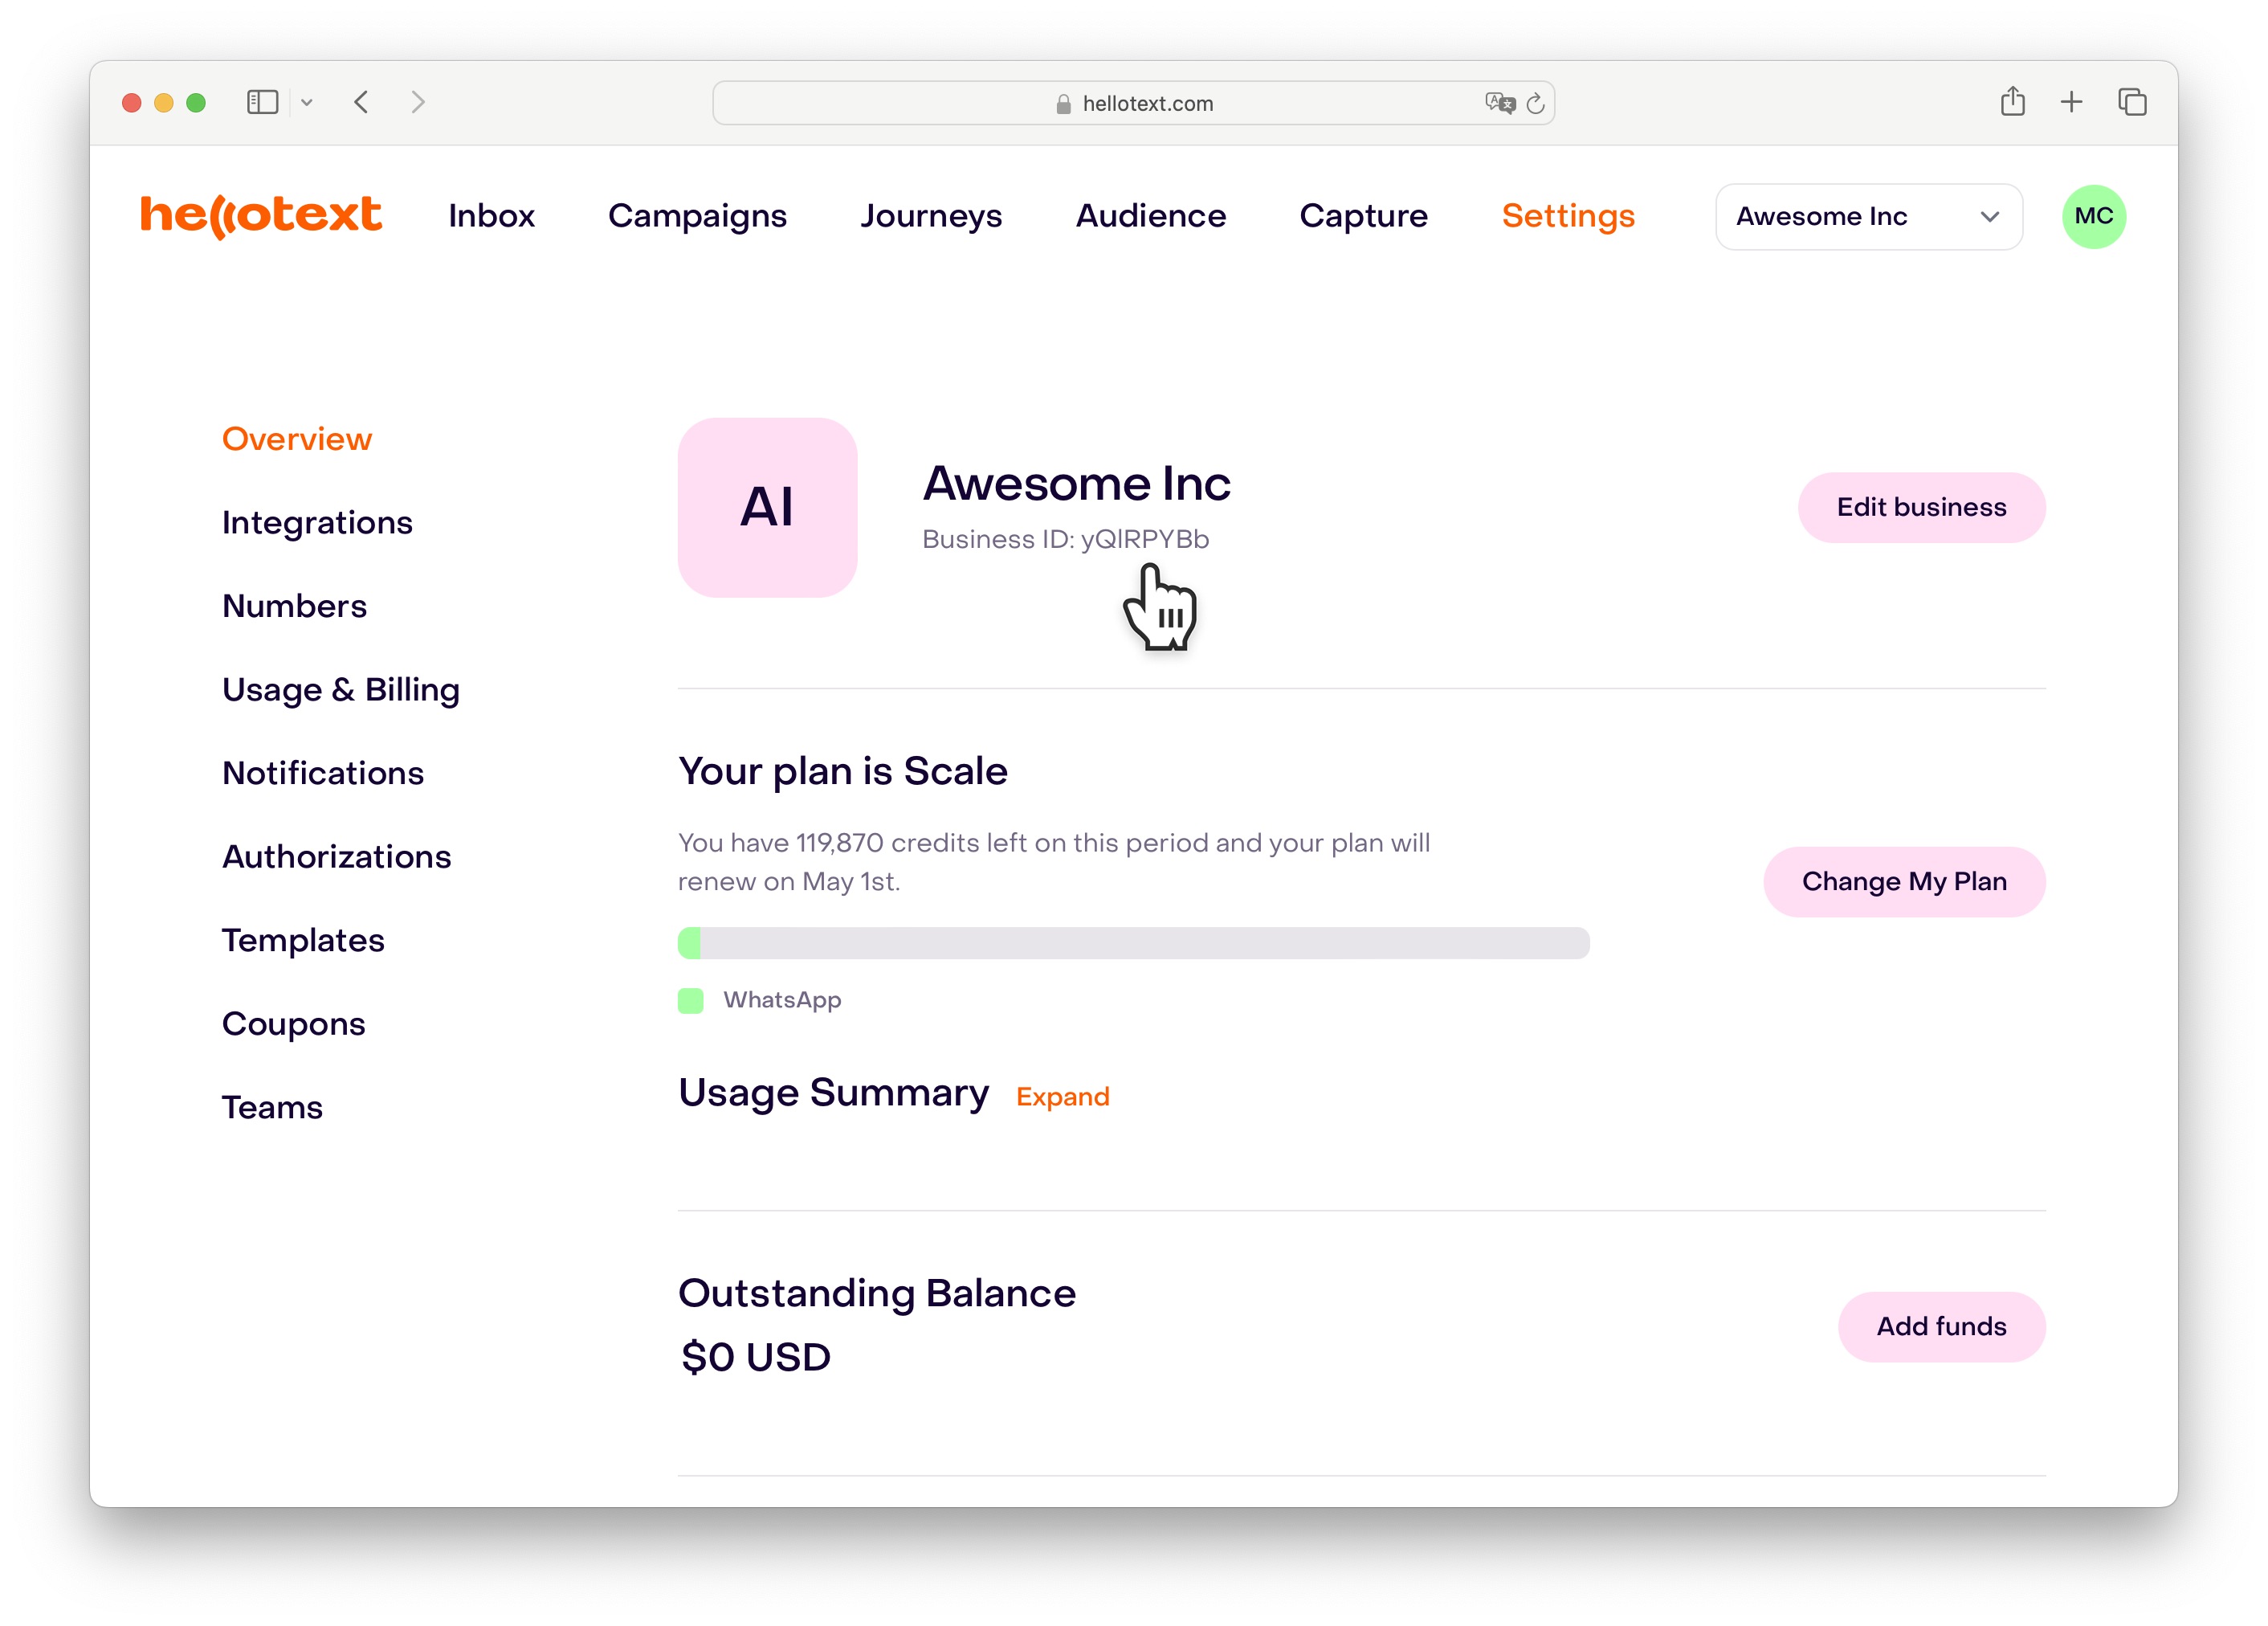
The first thing you need to do is obtain your business identifier in Hellotext.
From your Hellotext business panel, visit the Settings section and you will find it below your business name.
Select and copy this identifier as you will need to add it to your WooCommerce site.
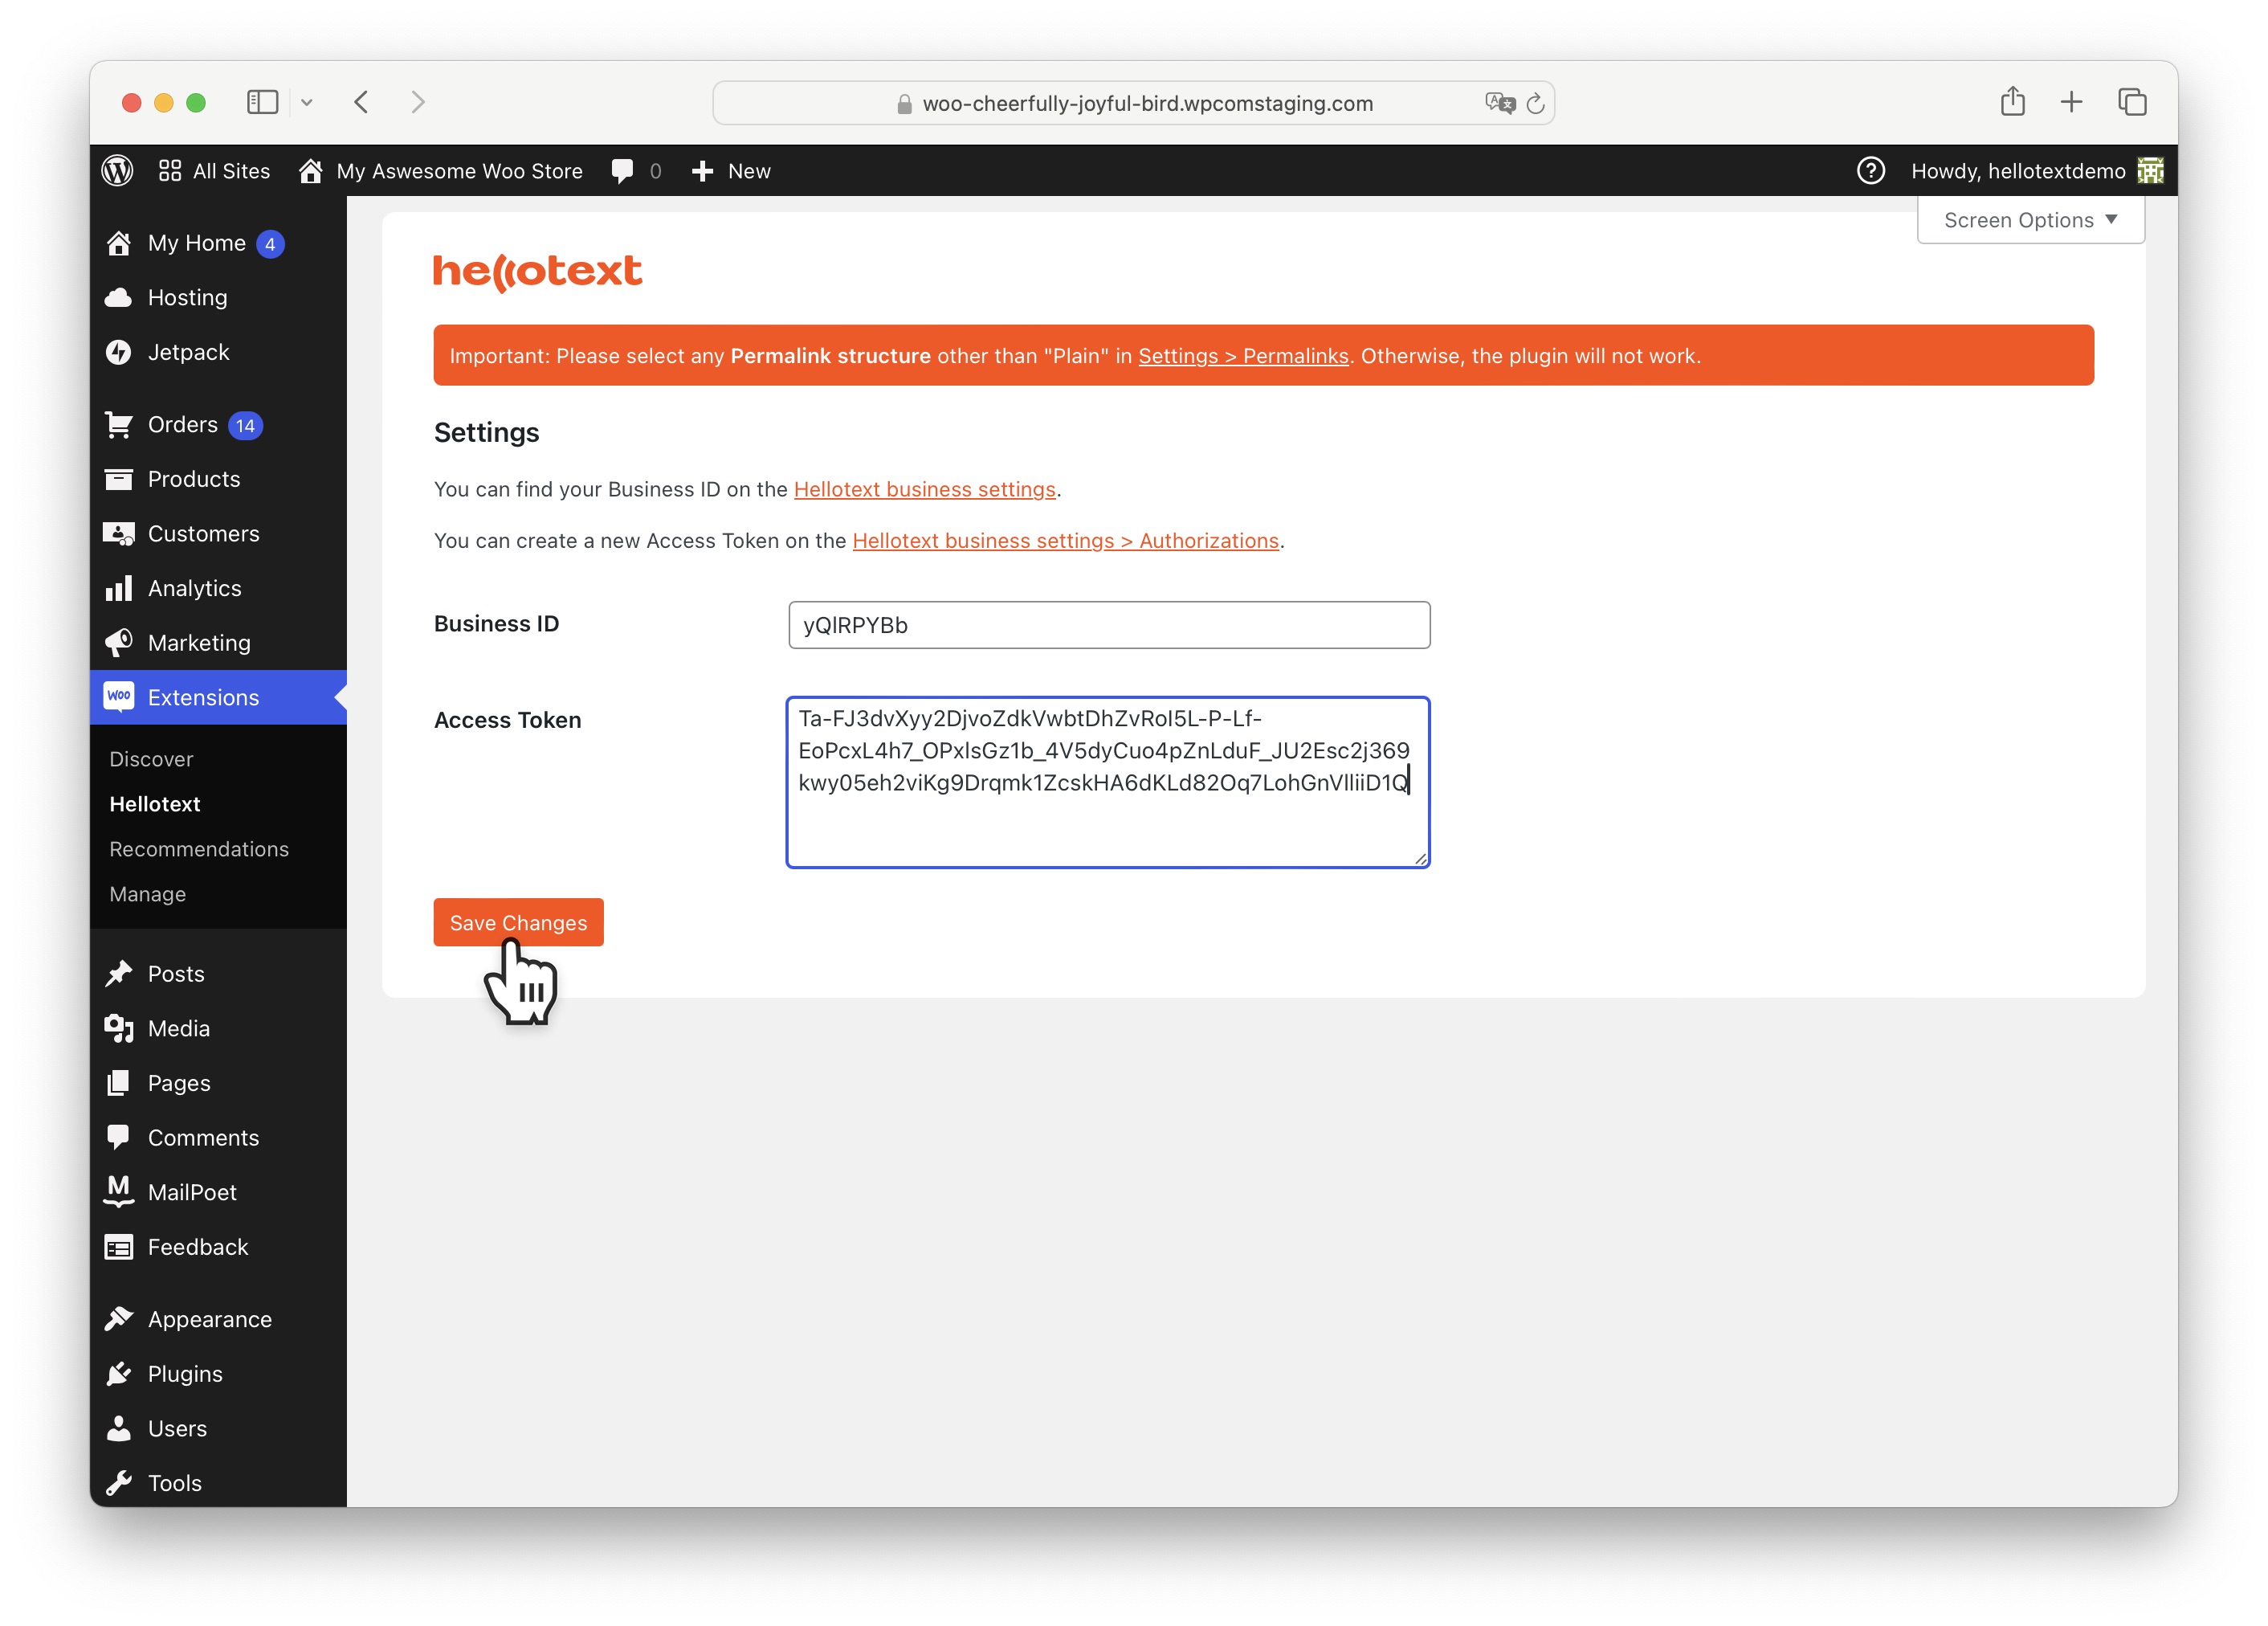
From the Extensions section in your WooCommerce site, click on Hellotext.
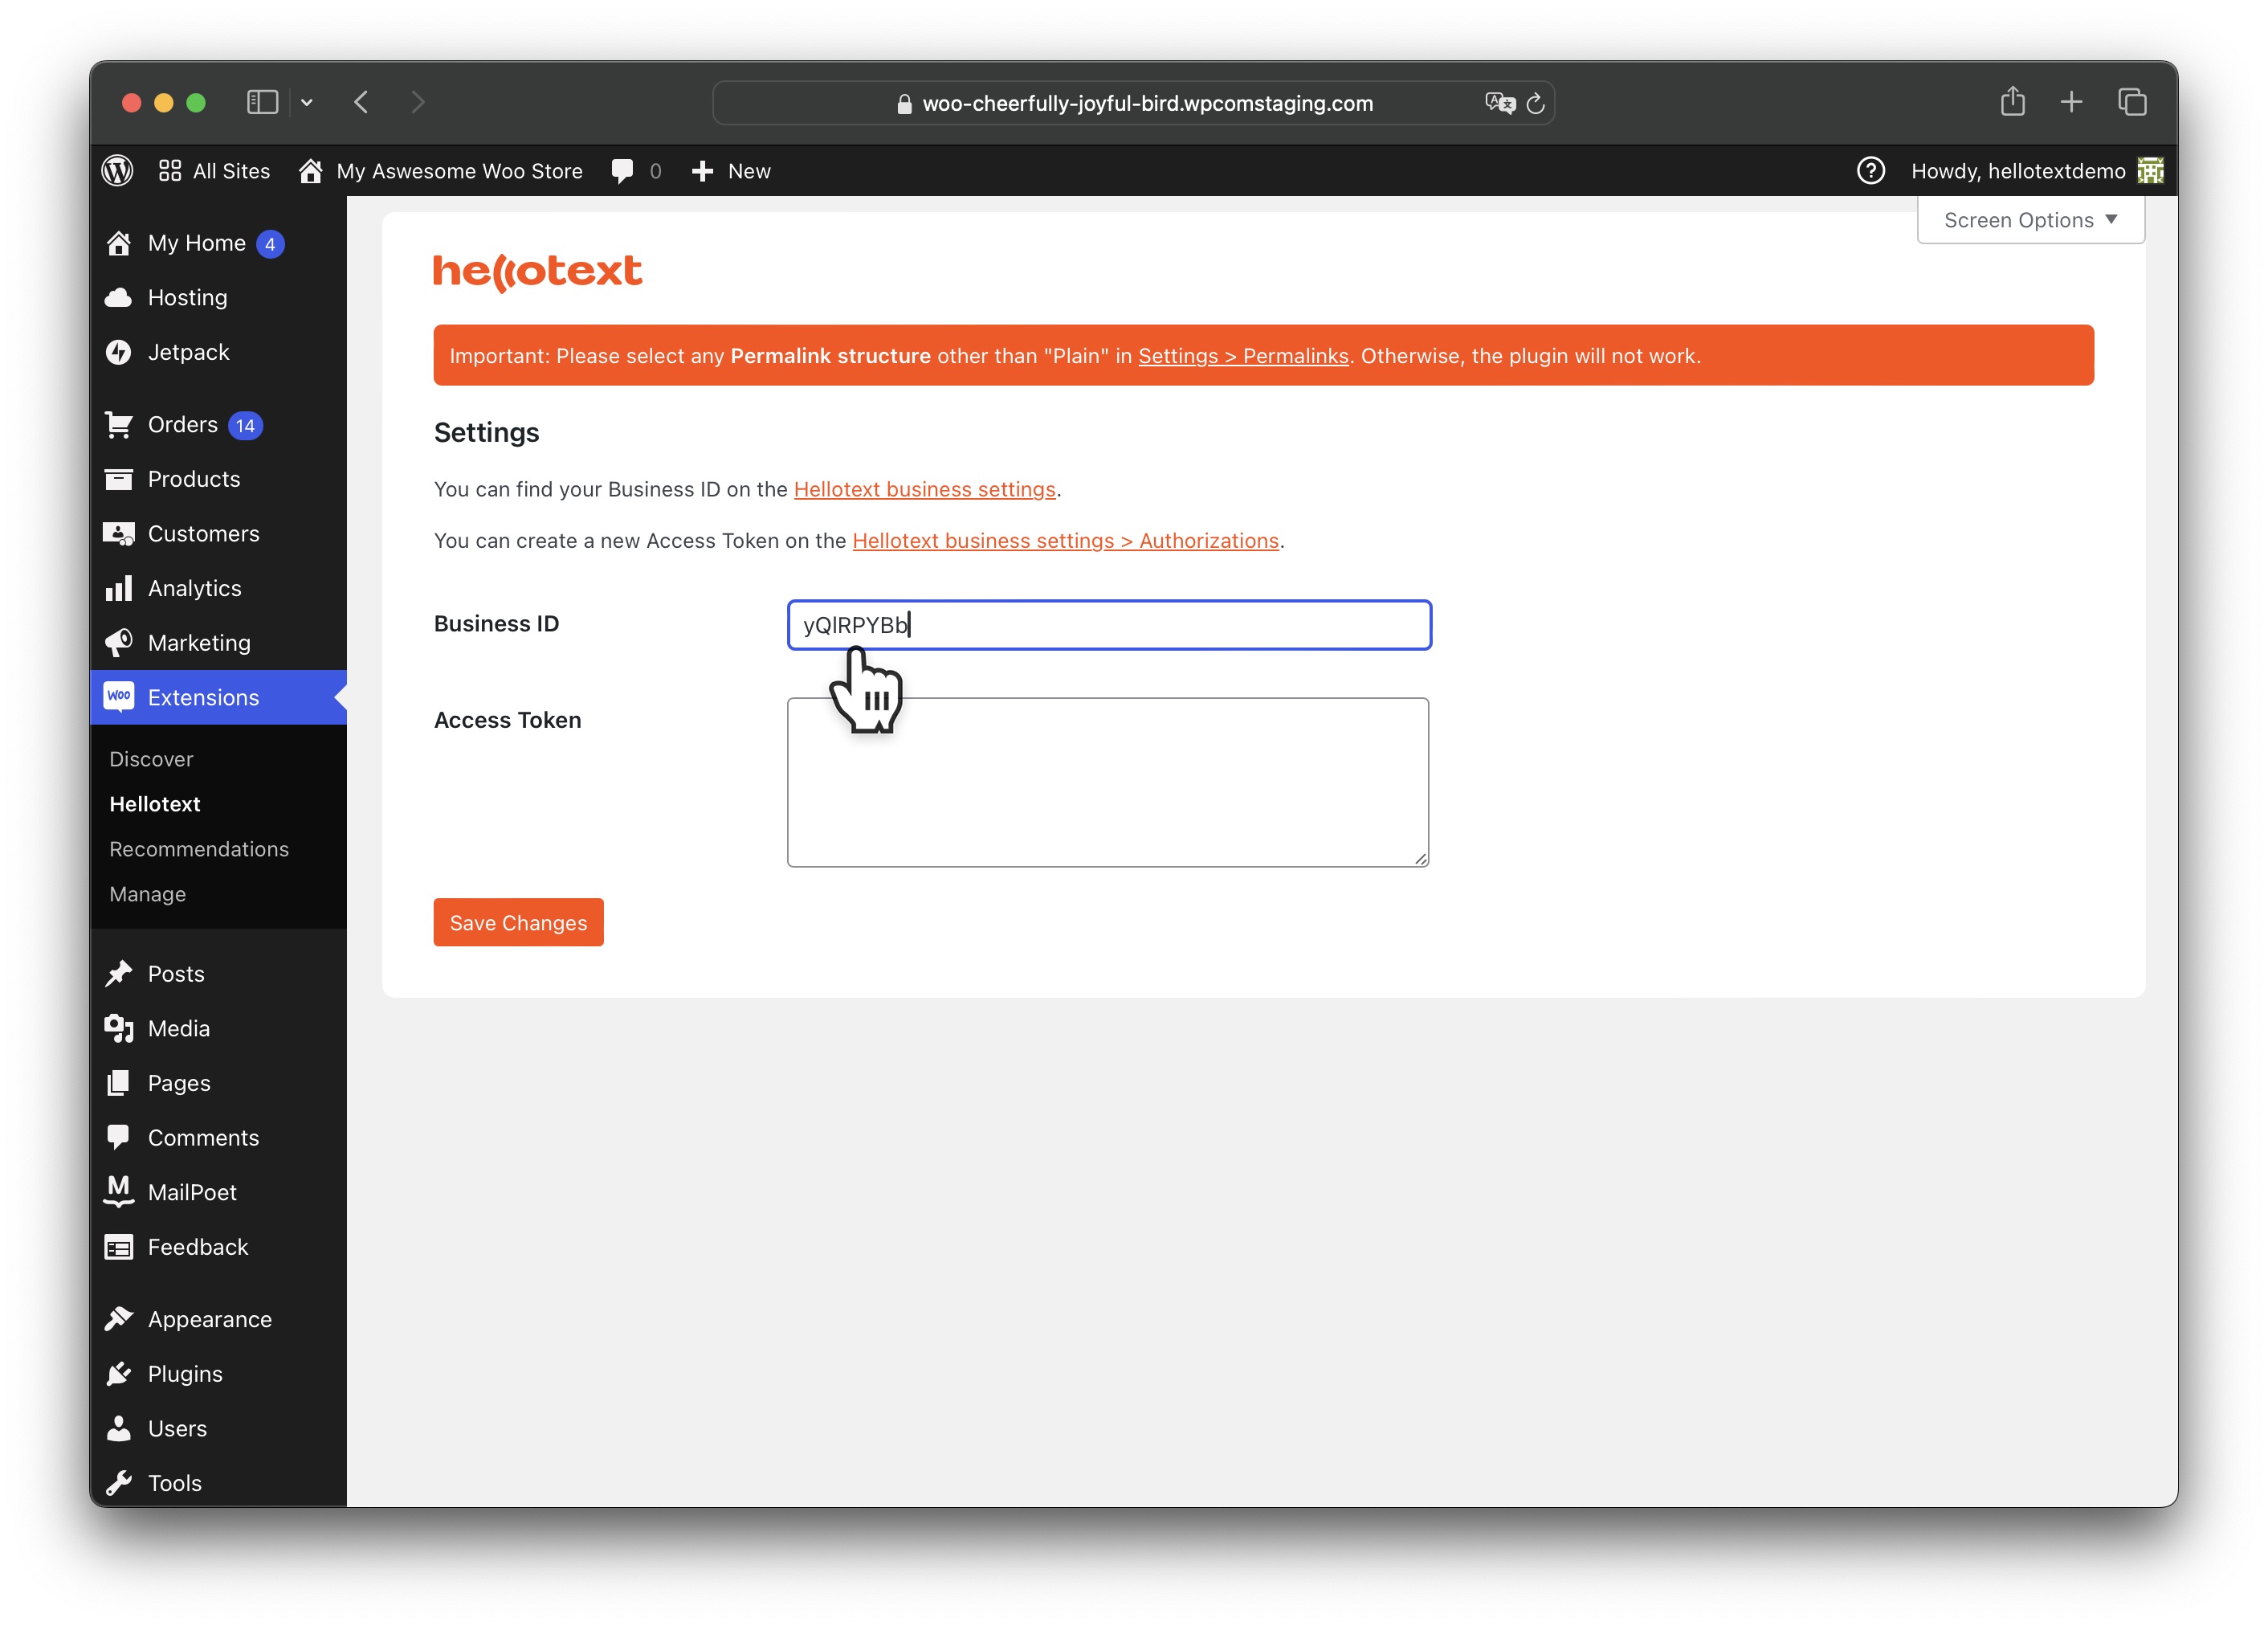
Paste the business identifier you copied from Hellotext into the Business ID field.
Go back to Hellotext and, from the Authorizations section, click on Create new token.
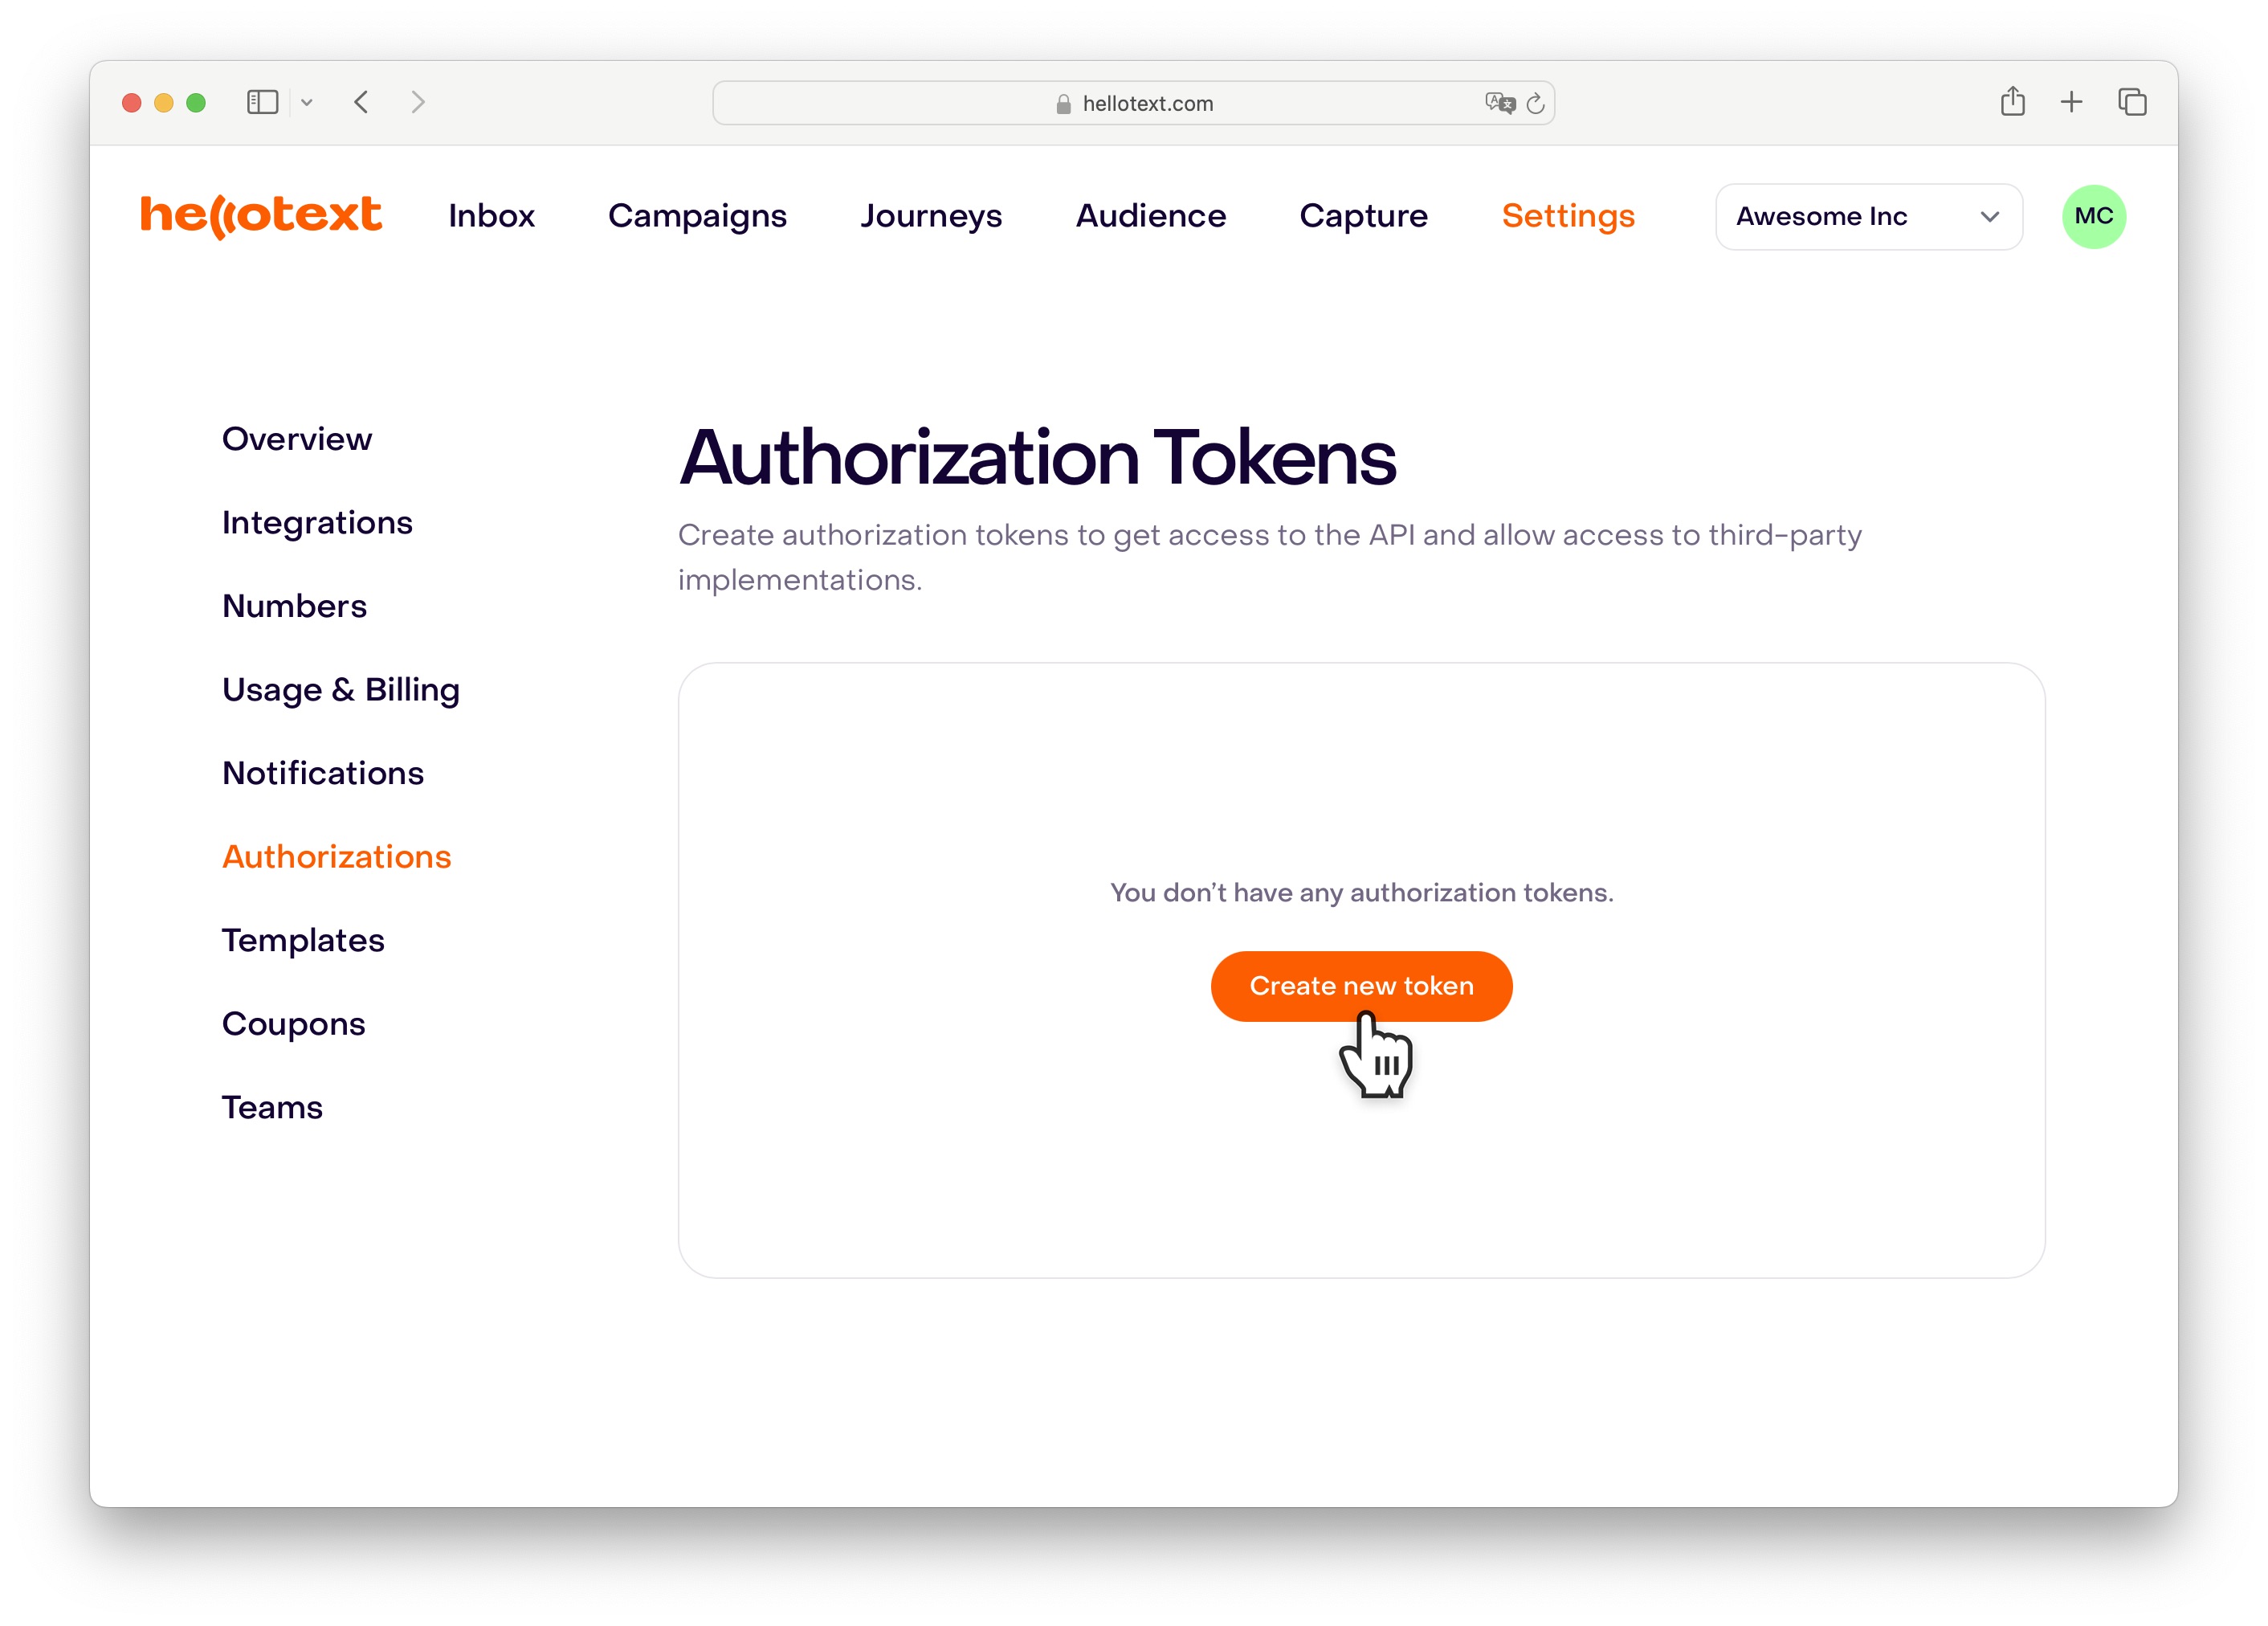
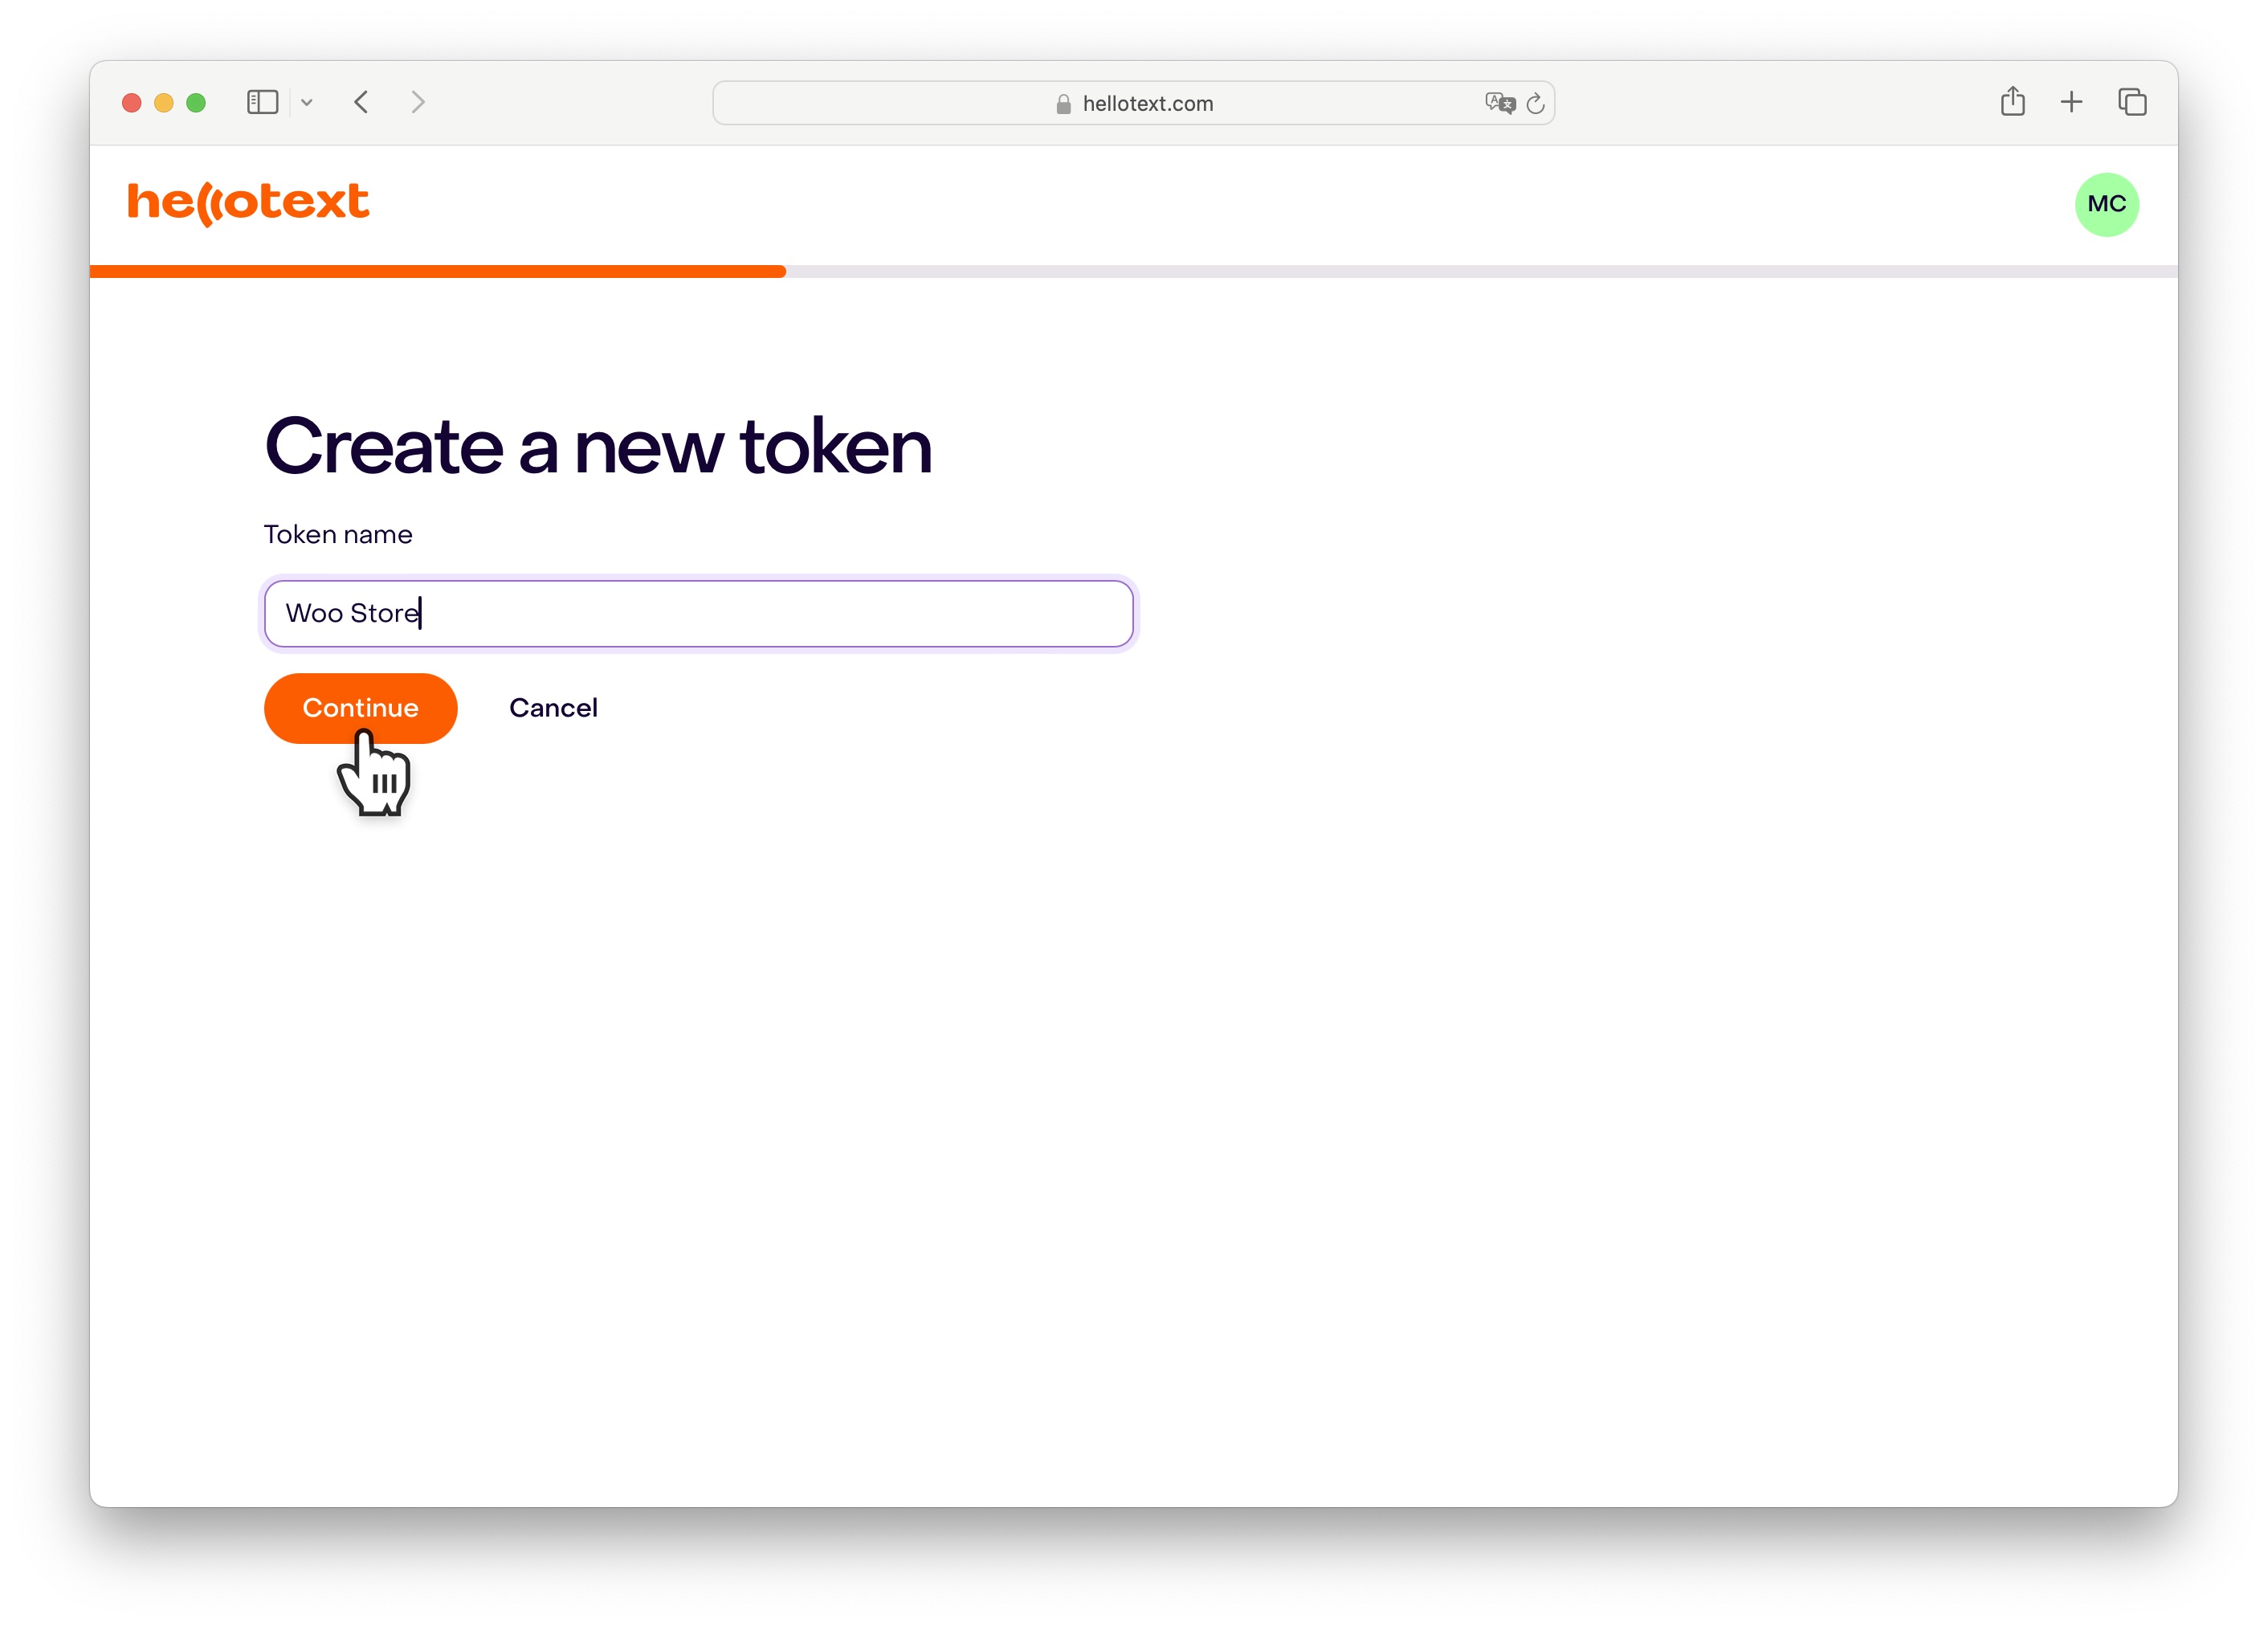
Enter a name for your token that identifies your site.
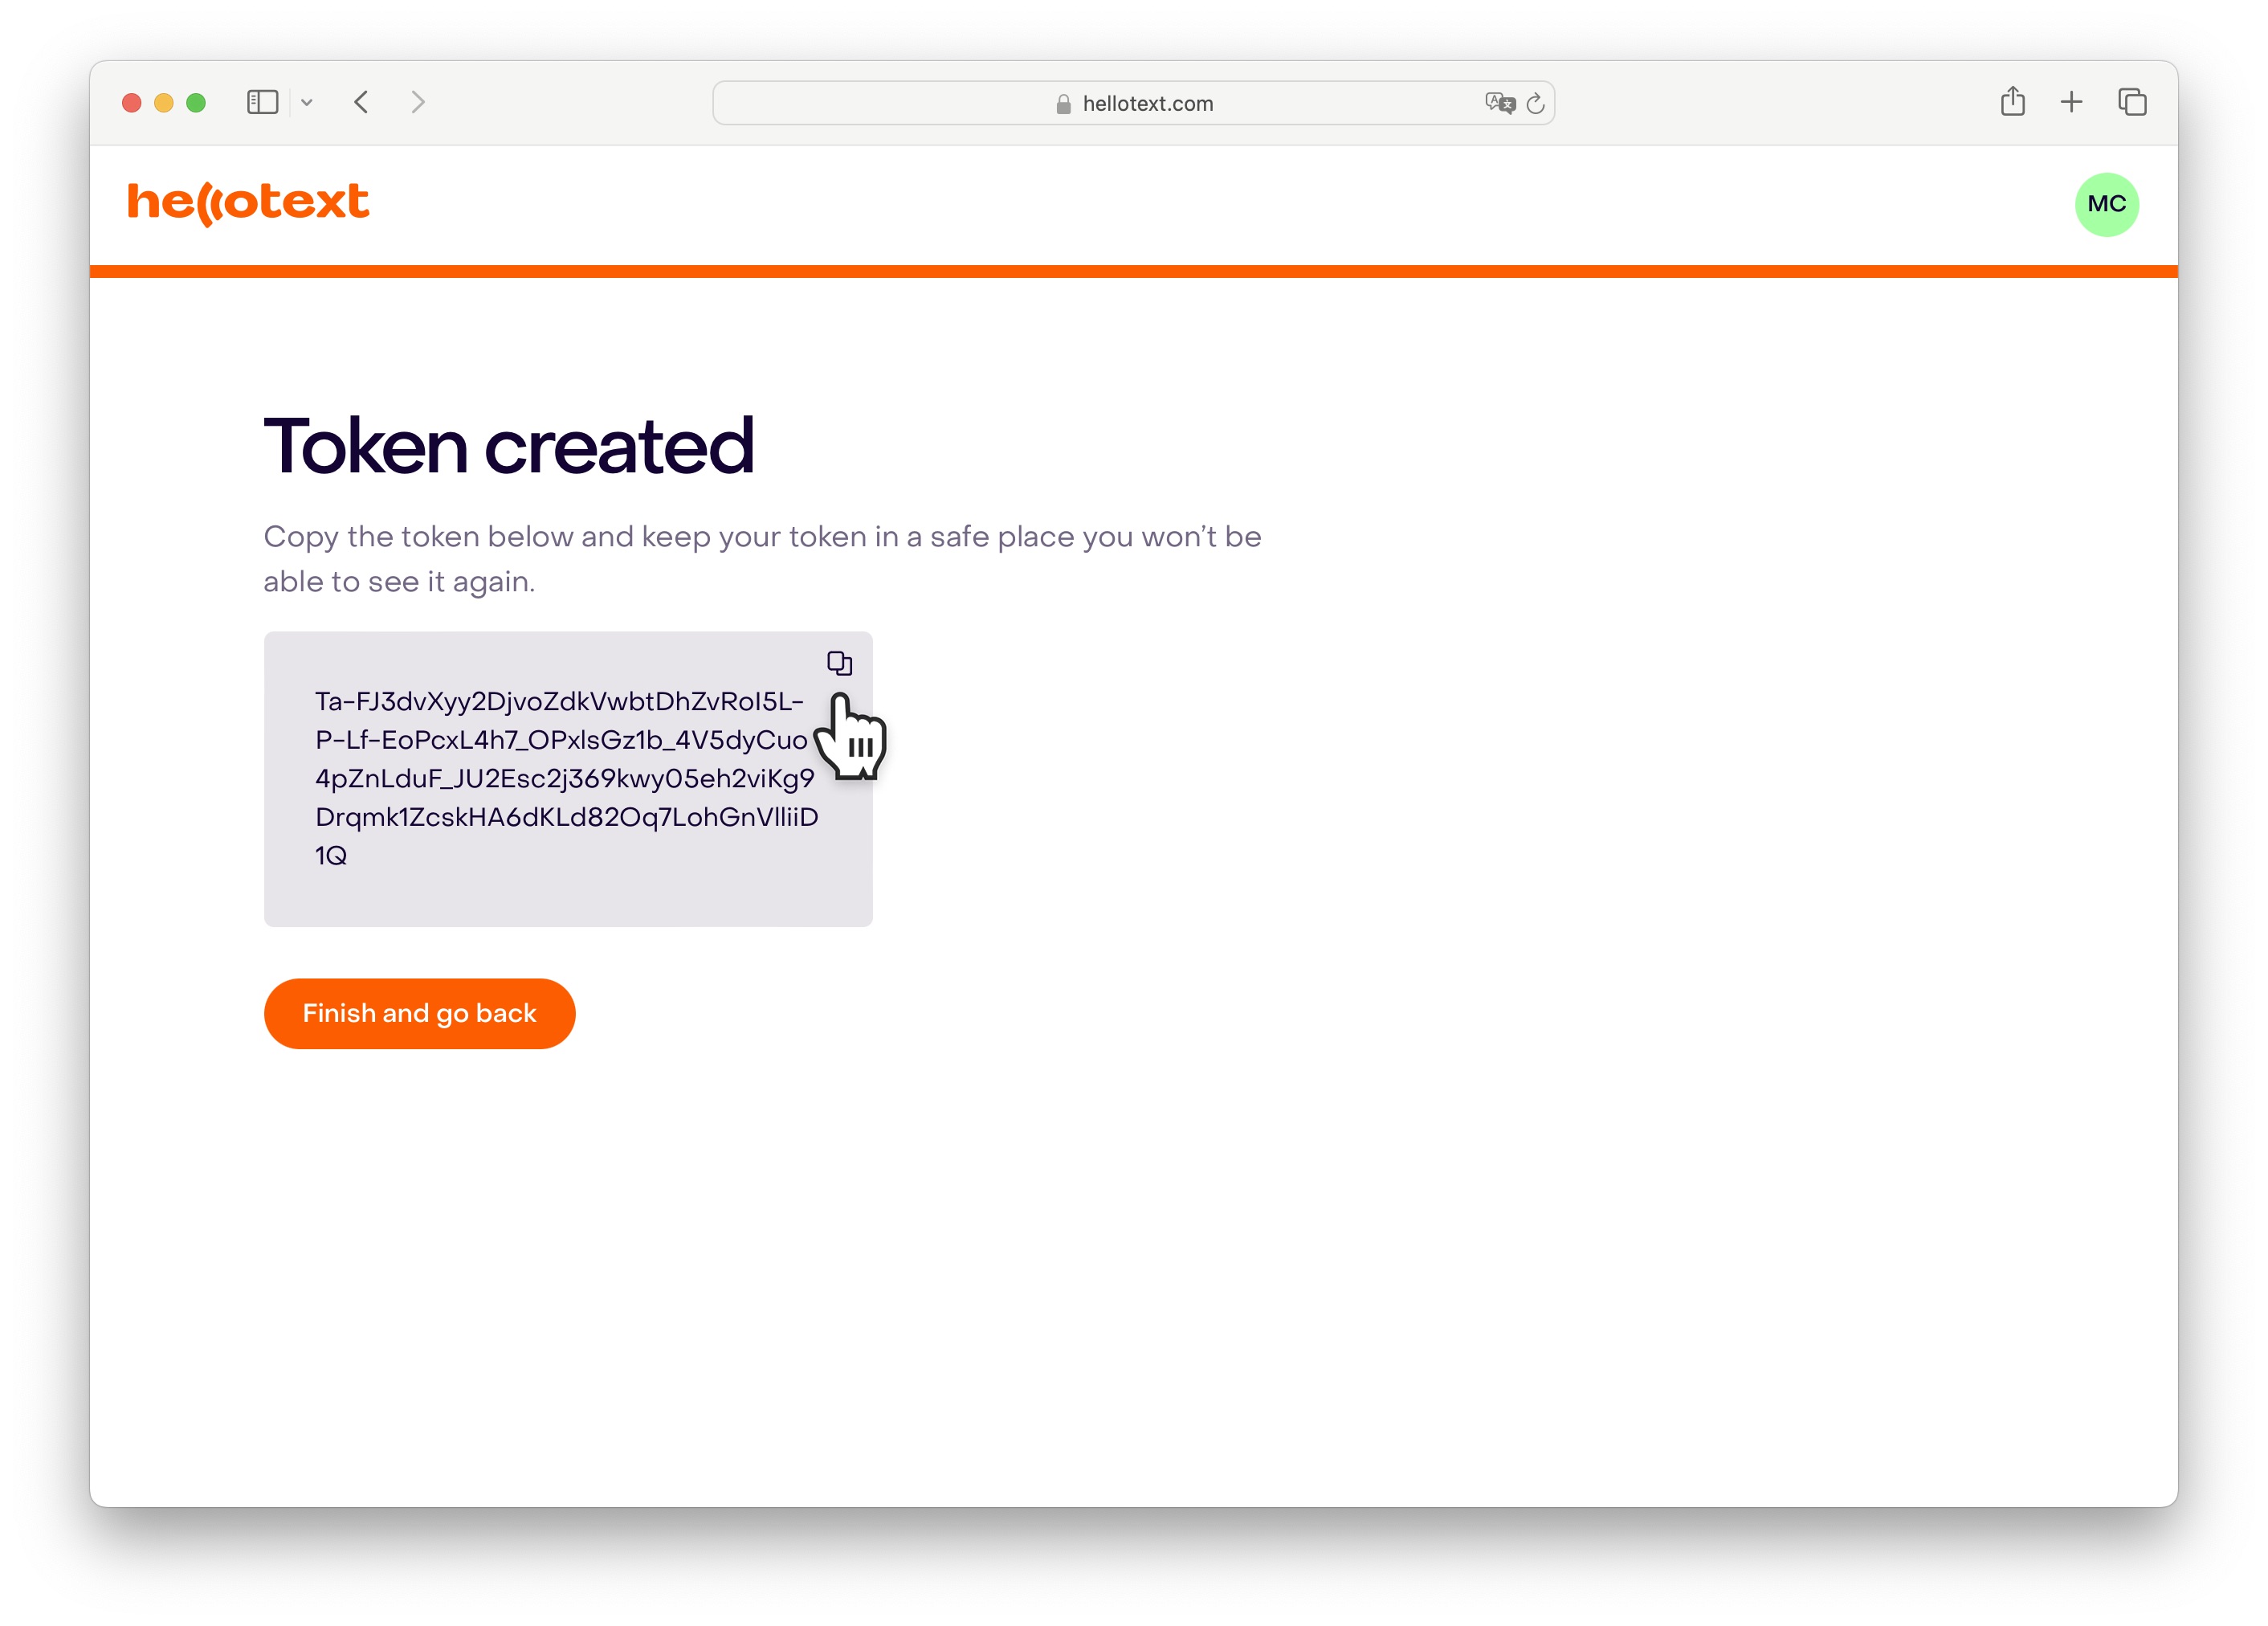
Once created, click on the indicated icon to copy your created token.
Now, go back to your WooCommerce panel and paste the authorization token into the Access Token field.
Click on Save Changes to save the changes.
Done! Your WooCommerce store is now connected to Hellotext.
Next Steps
From now on, you will start seeing customer activity reflected in Audience and the Inbox.
You can click on each profile to see the activity history they perform in your eCommerce.
Use this activity as signals for segments, playbooks, routes, campaign targeting, and reporting.